A Cuppa Joe and Hand Tools: Tales from the Workshop
So, there I was, sitting on my rickety old workbench, the smell of fresh-cut pine hanging thick in the air, a steaming cup of coffee cradled in my hands. It was one of those quiet mornings—no traffic humming outside, just the occasional chirp of a sparrow. I had just kicked off a project that had been rattling around in my head for weeks: a simple, but elegant coffee table. I thought, "Yeah, I can do this!" But ya know how that goes, right?
Some days, it feels like a clear path ahead, but other times—man, it turns into a real backyard wrestling match.
A Rocky Start
It all began on a Saturday morning when I decided to finally make use of that hunk of walnut I’d been saving for "just the right project." I’ve always had a soft spot for walnut, can’t beat that rich, dark color, and the grain—oh, the grain! Just looking at it gives me a little buzz of excitement. But boy, was I in for a surprise.
You see, I had this vision of a sleek coffee table with a smooth finish and clean lines. Simple, right? Well, as I began laying out my plans, I realized I didn’t have half the tools I needed. Normally, I’d have relied on my trusty hand tools, but a few had wandered off over the years—probably buried somewhere in the chaos I call a garage.
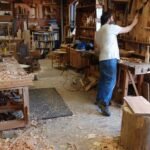
So, there I was, standing in front of the wall of tools, scratching my head. And let me tell you, looking at a wall of tools and thinking, “What do I do with this?” can feel like being a kid in a candy store with no money. I picked up my chisels, some CRAFTSMAN hand planes, and an old coping saw I swear has had the same blade since the ’80s. I thought about what my granddad used to say: “Good tools make all the difference.”
The Planing Drama
I started with planing the walnut—first the edges, then the surface. It was a real learning curve. The sounds of the blade slicing through wood can be mesmerizing, like music. But halfway through, I was fighting the darn thing. I realized I hadn’t sharpened the blade in, well, who knows how long? It felt like trying to slice bread with a butter knife.
After what felt like an eternity of wrestling with that plane, I finally sat back, my hands covered in sawdust, swearing at myself under my breath. I almost gave up right then and there. You know that feeling when you just want to throw in the towel? But somehow, after a few curse words and a break for some of that coffee, I picked up a sharpening stone instead.
It’s funny—once I got that blade where it truly needed to be, suddenly, it was like I’d discovered a new tool. It glided like butter. I couldn’t help but chuckle when I realized I was dealing with something simple: take care of your stuff, and it’ll take care of you.
Joining Pieces Together
Now, with my walnut boards planed down to perfection, it was time to join them. I went with a biscuit joiner, which thankfully I had kicking around, still packed in its original box. I’d seen how quick and easy it could make things, but there’s always that initial hesitation (“What if this goes wrong? What if I mess it up?”). You know the feeling; it’s like standing at the edge of a diving board, nerves twisted tighter than a pretzel.
I took a deep breath, lined up the pieces, and made my cuts. When I put those biscuits in and pressed the pieces together, I felt like a magician. I mean, seriously, I almost jumped up and down like a kid at a carnival when it actually worked.
Sanding the Rough Edges
Now came the dreaded part: sanding. I’ve got a few power sanders, but there’s something meditative about using hand sanders. I always keep a stash of 120 and 220-grit sandpaper nearby—feels like comforting old friends. I took my time, moving the sandpaper over the surfaces, letting it glide, trying to catch imperfections. As the dust floated around me, I felt like an artist perfecting a canvas.
But oh boy, the dust! You get in a rhythm, and before you know it, you’re coated in it like flour in a baker’s kitchen. I had to step outside to breathe, laughing at how goofy I felt, looking like a lumberjack lost in a snowstorm.
Finishing Touches and Realizations
Finally, I reached for the finish. I remember the first time I tried oil on a project—it went everywhere, and I regretted it instantly. But this time, I went with a wipe-on poly. Simple, easy, and no mess. It brought out that beautiful grain in a way that made my heart skip a beat. I sat back, admiring my work, and thought how far I had come since those frustrating moments at the start.
As I wrapped up, I ended up sitting on the floor, mixing leftover varnish with some mineral spirits to make the cleanup easier. I chuckled, thinking about how the journey from a messy garage to this beautiful table wasn’t just about the project; it brought memories of my dad and granddad working at their benches. It was a reminder that each scratch on the surface had a story, every coffee ring from where I’d set my cup, a memory.
A Final Thought
So, if you’re toying with the idea of diving into woodworking or even just tinkering around a bit, let me say this: just go for it. Don’t stress about having the shiny tools or the perfect wood, and don’t let a few hiccups make you second-guess yourself. Each mistake will teach you something new—believe me, I’ve had plenty.
At the end of the day, it’s about finding your flow, making something you love, and maybe sharing a cup of coffee while you admire what you’ve done. You might even surprise yourself along the way.