The Joys and Challenges of Riveted Woodworking
You know, I’ve always been the kind of person who finds peace in the sound of a saw cutting wood and the smell of fresh pine. There’s something about it that just… calms my soul, you know? So, when I stumbled across riveted woodworking—well, let’s just say I was hooked, but also in way over my head.
It all started a couple of years ago when I was thumbing through some old woodworking magazines at my buddy’s garage. You know the ones, yellowed from age and full of those glossy ads for tools you just know you’re not gonna buy. Somewhere between the coffee stains and dog-eared pages, I spotted a beautiful coffee table that had these amazing riveted joints. At the time, I was putting together a furniture set to spruce up my living room and thought, “Well, heck, that would be a fun way to add some character!”
The thing is, I didn’t really understand what I was getting into. Riveting wood? I thought, “How hard can that be?” Spoiler alert: harder than it looks.
Getting Started
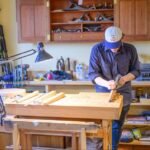
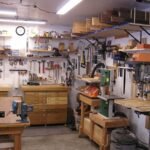
So, it was a rainy Saturday, perfect for a project. I headed out to my garage, excited. I picked out some red oak for its warm color, and it smelled like heaven the minute I opened the package. Seriously, there’s nothing like that sweet, woody aroma that fills the air when you cut into fresh lumber. It’s like a gift from the forest.
I went to the hardware store to pick up some tools—fancy stuff like a rivet gun and, of course, tons of rivets. So many rivets. I ended up with a box of 100, thinking, “Surely, I won’t mess this up too much!”
Well, let me tell you, I had no idea how wrong I was.
The First Mistake
I started all gung-ho, measuring everything out. You’d think measuring would be straightforward, right? Nope. I can’t tell you how many times I miscalculated. At one point, I eyeballed a cut, thinking, “Ah, that’ll be fine.” Spoiler alert again: it wasn’t fine.
I nearly lost it when I realized I’d cut a piece three inches too short. I stood there staring at that board, measuring tape in hand, feeling like a complete fool. “Who even does that?” I muttered to myself. After a deep breath and a short walk around the garage to collect my thoughts, I just laughed. I guess it’s like they say—imperfect wood becomes character.
Making Progress
So, after some more precise measurements—and some additional pieces to take up my blunders—I finally started assembling the table. The sound of drilling those rivets into the wood was oddly satisfying. You know that heavy clunk as the rivets go in, and then the sudden silence when they’re set? It’s like a promise that what you’re building is actually going to hold together.
But then came the fun part—deciding how to finish it. I had this vision of a rustic, dark stain. After brushing on that first coat, I stood back and admired the deep, rich tone coming out. It was like giving the wood a new life—and I was proud as a rooster.
The Finishing Touches and the Big Oops
Ah, but I was too cocky. I wanted to hurry up to the final step, and I rushed the finishing process. I didn’t allow enough drying time before I maneuvered the table for the final rivets. Cue the inevitable disaster.
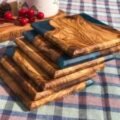
I ended up with a massive runny stain on one side. “Great,” I thought. “Nothing like a river of stain to ruin the hard work.” I sat there, staring at my creation, wondering if I should just throw in the towel. The negative thoughts came creeping in, "Maybe I should just stick to cutting boards," but I finally pushed them aside. I took a breath, grabbed some sandpaper, and went to work.
Achieving the Look
After what seemed like an eternity of sanding and re-staining, I got it back to a place where I could at least bear to look at it. And you know what? When that last rivet finally set and I stepped back, I couldn’t help but smile. Like, a real smile. It actually looked pretty amazing. I had created something with my own two hands, flaws and all.
As I put those last-minute touches on the table, I almost laughed out loud when I saw all the little imperfections up close. I couldn’t help but love it even more—the wobbly legs, the random splashes of stain, the uneven rivets. All of it just added to the charm.
Takeaway
So, after all those ups and downs—mostly downs, if I’m being honest—I’ve learned that this craft isn’t just about the finished product. It’s about the journey, the mess-ups, and the moments of doubt. Each mistake is a story, a part of you that makes what you build unique. Riveting woodworking taught me the importance of patience and to appreciate the little things, even the not-so-perfect parts.
If you’re thinking about diving into this world, just go for it. Don’t stress too much about getting it right the first time. You’re going to mess up, and that’s totally okay. This isn’t just about wood; it’s about you making something that tells your story. So grab that saw, embrace the chaos, and just enjoy the ride. You might be surprised at what you create.