Close Grain Woodworking: A Journey of Mistakes and Magic
So, I was sitting out in my garage the other evening, sipping on my usually mediocre coffee—one of those cheap brands that taste like they’ve been sitting in the pot for way too long—and staring at a pile of wood. There are pine boards stacked on one side and some beautiful maple on the other. I swear, I could almost hear them whispering, coaxing me into a new project. But lately, I’ve been diving into the world of close grain woodworking, a journey that’s had its share of missteps and unexpected joys.
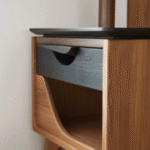
Now, you might wonder why I’m all about close grain wood these days. For me, it started with a simple bookshelf I wanted to build, something that would stand the test of time and carry all those dusty old paperbacks I can’t seem to part with. I went to the local lumber yard—an hour drive along the back roads because, let’s be honest, that little shop has some character. They carry this curly maple that smells just heavenly when you cut it. It practically draws you in, begging you to carve something beautiful.
The First Cut
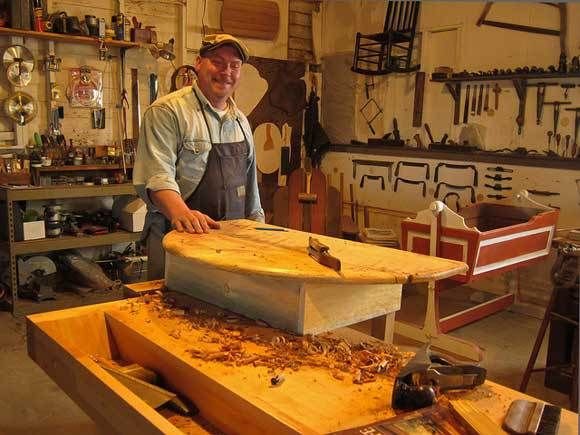
So there I was, standing in front of this beautiful board, just itching to get going. I had all the usual tools at my disposal: a tablesaw, some trusty clamps, my old wood plane that’s seen better days, and even a router I bought used from a guy on Craigslist—who, by the way, had the shadiest smile I’d ever seen.
You’d think I’d be all set, right? But here’s where it gets tricky. Close grain woods like maple or cherry can be pretty finicky. I remember the first time I wasted an hour trying to get a clean cut. I was so excited, and then… bam! Tear-out. It was like they laughed at me: "You think you can just slice through us?" I thought about throwing my saw across the room, maybe even giving up right then and there. But I knew deep down that the only way is to learn from it, however frustrating it might be.
The Struggle is Real
That’s when the learning curve hit me hard—like a world-class slap to the face. I figured maybe I just needed a different blade, so I bought a fancy cartridge-style blade designed for fine cuts. It felt like an investment at the time, but boy, was it worth every penny. I remember unboxing it and taking a whiff of those metal shavings when I finally made the first cut after installing it. The sound of the saw humming along, the wood almost giddy to finally be shaped—it’s a feeling I can’t quite put into words.
With that new blade, things started moving along, and I was slowly getting the hang of things. I felt like I was channeling my inner carpenter as I sanded the edges, the whirring of the sander filling my small garage. But then came the moment of truth: fitting the pieces together. I spent one late night wrestling with joints; there was a point where I nearly threw everything aside in frustration. “Why can’t it just fit like a glove?” I found myself mumbling, wondering if I was cut out for this at all.
A Glimmer of Hope
But, you know, it’s funny how things turn around. One evening, I decided to let things sit for a day, clear my head—or maybe it was just a good excuse to avoid the mess for a bit. But when I came back, I took a deep breath and tried again. I approached it like it was a puzzle instead of an enemy. And it worked! I remember almost laughing in disbelief when I finally attached those pieces and they just… clicked. Just like that, I thought, “Huh, maybe I can do this.”
That furniture came to life in my hands, all because I let go of the anxious rush to finish it. The scent of the wood, that sweet mixture of sap and varnish—it wrapped around me like an old friend, reminding me why I started woodworking in the first place.
Finishing Touches
Now, finishing close grain wood is a whole other story. I tried my hand at staining it, and let me tell you, that was another learning experience. I picked up a dark walnut stain, thinking it would look rich against the light maple. I applied it with high hopes, and it looked beautiful—at first. Then, after it dried, there were these splotchy spots that looked like a horror movie. I sat there, staring at my mistakes, feeling a bit defeated.
But that day turned out to be a lesson in patience. I sanded it back, applied a seal coat, and went for it again. This time, with a gentle hand and a calm mind. And you know what? It actually worked! Watching the wood grain come alive under that smooth finish was like watching a sunrise after a long night.
Warm Thoughts
So, all said and done, I learned something important throughout this whole process. Woodworking is much like life itself. You’ve got to embrace the mess, the mistakes. The sound of the wood cracking, the sweet smell of sawdust, and even the moments of frustration—they all blend together into this beautiful journey. There’s a certain pride that comes with taking a raw piece of wood, full of potential, and turning it into something worthy of display.
If you’re even thinking about trying this—just dive in. Seriously. Each mistake, every miscalculation, adds a layer of richness to your experience. You don’t have to be perfect; you just have to be willing to learn. It’s the journey that makes it all worthwhile, trust me on that. So grab that wood, roll up your sleeves, and get started. You might just surprise yourself with the results.