My Adventures in Mysore Inlay Woodworking
You know, there was a time when I didn’t know the difference between oak and birch, let alone all these fancy hardwoods and exotic designs. But then, I stumbled upon something that changed my perspective entirely: Mysore inlay. Now, let me just pour a bit more coffee here, and I’ll tell you how it all began.
The Spark
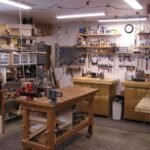
So, picture this: I’m in my little workshop—let’s be honest, more of a garage than anything. One Saturday afternoon, I was browsing through Pinterest, because who doesn’t get lost in a rabbit hole of DIY projects? I came across Mysore inlay, and I was just entranced. It’s this beautiful woodworking technique from India where different colored woods are layered to form intricate designs. There was something about the rich patterns that pulled me in.
At that moment, I felt this rush of inspiration. I thought, "Heck, I can do that!" But deep down, I had my doubts. I mean, I was still getting used to sanding straight lines, and here I was talking about decorative woodworking—fanciful stuff. But you know that feeling when you just get hooked? I decided I had to give it a shot.
The Wood Hunt
Fast forward to a trip to the local lumber yard. What a scene! The smell of fresh-cut wood was overwhelming, in a good way, like nature was calling me. I had no idea what I was looking for exactly. The guy behind the counter probably thought I was a total rookie, and honestly, I was. After scratching my head and awkwardly fumbling through the options, I ended up with some teak, mahogany, and what I thought was an exotic wood called Indian rosewood.
Now, I’ve learned it can be tricky to find good quality woods, especially the kind that’s ideal for inlay. But boy, was I naive back then. I got home with my loot, feeling like a hero. But reality hit hard when I laid them out on my workbench. I had no clue what I was going to make. Here I was with these gorgeous pieces of wood, and my mind was blank.
First Attempts and Flops
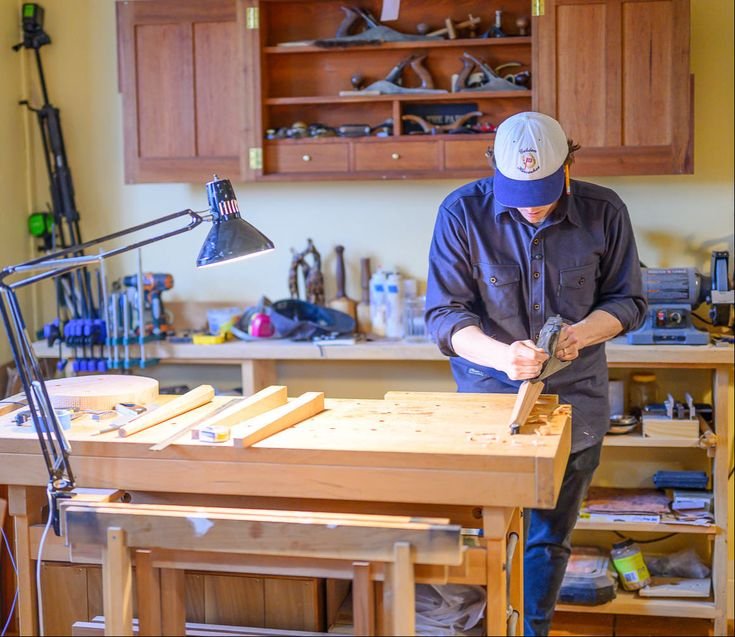
I was determined to dive right in. I must’ve watched a dozen YouTube videos, but when it came down to it, I was still in over my head. I drew a simple design—nothing too elaborate at first—just a small ellipse with some floral elements. Then I clamped the pieces down, grabbed my chisels, and thought, "Let’s do this!"
But oh, man. When I started chiseling into that teak, it didn’t go as planned. The grain seemed to fight back, and I remember thinking, “Why is this so hard?” I’d get through part of the design only to realize I’d accidentally gone too deep in spots. It looked like a woodpecker had gone at it in a few places. I almost gave up at that moment, seriously. I sat there staring at the mess, feeling defeated, like I just wasn’t cut out for this.
Persevering Through Mishaps
But I didn’t. I stepped away for a moment, brewed some more coffee, and decided to look at it from a different angle. I realized I needed to take my time. Inlay work isn’t just about rushing in; it’s like telling a story with wood. So, I went back and smoothed out my cuts, erasing the worst of my mistakes. I grabbed my router—let me tell you, that noise is like music when you get it right—and it felt like I was finally getting somewhere.
As I went along, I hit some lucky breaks, too. When I finally fit the rosewood into the mahogany, I was giddy. It was one of those moments where you think, “Wait—did I actually make that?!” My heart raced when I saw those colors coming together, and for the first time, I felt confident, like I had a handle on this inlay business.
The Finishing Touches
Now came the finishing part. This was new territory, too. I didn’t know the first thing about oils or lacquers, but I just rolled with it. I decided to use Danish oil because, well, it sounded fancy and had decent reviews online. Applying it was like putting the cherry on a sundae. Watching the grain pop and that deep, rich color come through was just… I mean, wow. My little project felt alive.
But there’s always a catch, right? As I was wiping down the excess oil, I accidentally smudged the edges of the design. My heart sank a little, thinking I had ruined it. I sat back and stared, contemplating if I should add more layers or just call it quits. But after a few moments, I just laughed. I thought, "Hey, that’s art, right?"
The Heart of It All
In the end, I learned something important: mistakes can become part of the personality of a piece. That’s the beauty of woodworking, especially with Mysore inlay. It taught me patience, the importance of taking a step back, and to not sweat the small stuff.
So if you’re thinking about giving something like this a try, just go for it. Seriously. Don’t be afraid to dive in and mess up. Because trust me—those little flops teach you more than any perfect finish ever could. And who knows, you might just create a piece that tells your story along the way.