Woodworking Plans for Clocks: A Journey of Enthusiasm and Missteps
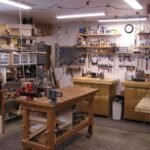
So, there I was—sitting in my little workshop last summer, coffee steaming on the bench beside me, staring at a pile of wood I’d managed to scoot together the week before. For a while, I had this crazy idea brewing in my head about making a custom clock. You know, the kind that spins slow enough to remind you that the world won’t end if you take a breath and enjoy the moment. I had seen some free woodworking plans for clocks online and thought, “How hard can it be?”
Ah, the innocence of ambition and a few too many YouTube tutorials.
The Search Begins
I remember scrolling through all those plans like a kid in a candy store—different styles, different intricacies. Some were sleek, modern designs while others looked like pieces you’d find in your grandmother’s cozy living room. I eventually settled on a classic wooden wall clock. Nothing too fancy, but with enough character to make it worthwhile.
I went with oak for the frame; it’s sturdy and smells divine when you’re working with it. There’s this earthy, warm scent that floats around the shop, wrapping around you like a familiar hug. I can’t quite describe how satisfying it is to sand it down and see that grain pop out—like revealing some hidden beauty trapped inside a rough exterior. But, boy, did I underestimate how much time that would take. You ever sand wood for too long? Your arms start feeling like jelly, and you start questioning your life choices.
The Grains of Wisdom
You’d think with all the plans I had, there would be no hiccups, right? I laugh now, but it was a whole different story back then. I had everything laid out: my miter saw, a random assortment of clamps I didn’t know if they’d actually hold, and these sweet little clock hands I found online. Spent an hour just deciding what color they should be—brass, copper, or maybe just plain black? I settled for copper. Looked classy and all, or so I thought.
Now, I’m not a master woodworker by any stretch of the imagination, but I figured, “How hard can it be to cut these pieces?” Let me tell you, the first time I went to mitre those angles, I almost gave up. I had my saw set wrong, and I ended up with a stack of mismatched pieces that sat there mocking me like little wooden ghosts.
I was frustrated, sitting there amidst my hopeless pile of what should have been a clock, and I almost tossed it all into the fire pit outside. But then I looked over to my coffee cup. You know, that moment of clarity when you see the steam dancing off the surface?
So, I took a break instead. You know, just sat in the sun, listened to the wind whisper through the trees, and took stock of what I had learned so far. Sometimes, that’s all you really need—a little pause to reorient yourself.
The Comeback
Eventually, I came back inside, realigned my saw, and after a few more attempts (and a huge helping of patience), I finally cut everything to size. I glued and clamped those pieces together like I knew what I was doing, and after an eternity of waiting, I began to see a clock form. It was scary, but when I stood back and saw those beautiful joints meeting just as they should, I laughed out loud.
Then came the drilling of the hole for the clock mechanism. Oh, the sweet smell of excitement mixing with the wood shavings flying everywhere! I used a drill bit that I thought was appropriate, but wouldn’t you know it? The hole ended up being way too big. The mechanism was wobbling around like it was on a carnival ride. So, there I was again, figuring out how to fix my latest blunder.
As fate would have it, I grabbed some wooden dowels, cut them down and glued them inside to secure the mechanism. It worked out better than I could ever have imagined. Sometimes, those little mistakes lead you to the best solutions!
The Final Touches
Once I had the clock assembled and it actually ticked — not too fast, not too slow — I felt like a proud parent. The face looked bare, though. It needed some finishing touches. I ended up painting the numbers on with a steady hand, and you know what? They turned out better than I expected. A little crooked, perhaps, but hey, that only adds character, right?
Finishing it off felt like the grand finale of a fireworks show. There’s just something special about standing back and admiring what you created—mistakes and all. It didn’t need to be perfect; it just needed to be my clock. And it was.
The Takeaway
So, if there’s one thing I want to pass on, it’s this: Don’t shy away from a project because you think you might mess it up. That’s part of the journey. I wish someone had told me earlier that sometimes the best ideas come from the mess-ups. You learn, you adapt, and before you know it, you have something you can be proud of.
If you’re leaning towards crafting something—whether it’s a clock or anything else—just dive in. Who knows, you might end up laughing at your own mistakes and creating something beautiful in the process. After all, that’s what makes it all worthwhile, right? So grab your tools, your coffee, and don’t hesitate. You’re probably just one adventure away from making something special.