The Day I Built My Shooting Board: A Tale of Triumphs and Oopsies
You ever find yourself staring at a pile of wood wondering what the heck you got yourself into? Happens to me more often than I’d like to admit. One rainy Saturday, while nursing a cup of strong black coffee—strong enough to peel paint, mind you—I decided it was time to build myself a shooting board. Now, let me clarify: I’ve done plenty of woodwork over the years, but building a shooting board? That felt like being thrown into the deep end without a life preserver.
Where It All Began
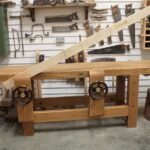
So, I’m sitting there, flipping through The Woodworker’s Journal, and there it is—a beautiful, simple shooting board that promises to elevate my woodworking game. “I can totally do this,” I thought. How hard could it be? Just a few cuts here and there, a bit of glue, and bam, I’d be planing my edges like an old pro.
I thought back to the time I built a bench—a solid piece, oak and all. But that took a while to figure out the dimensions, tools, and, you know, just how to avoid brutal mistakes. Still, I brushed that concern under the rug. I grabbed some 2x4s and a 1×6 of clear pine—not the most exotic choice but cheap and easy to find.
The Tools of the Trade
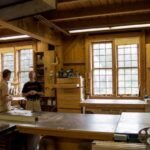
Now, my tools aren’t fancy. I’ve got a trusty old miter saw that smells like motor oil when you fire it up, and a hand plane that’s seen far better days. In fact, I think it could tell stories of projects left unfinished. But, hey, that’s part of the charm, right?
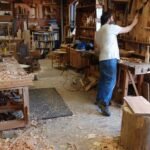
I laid the wood out in my garage, the sweet smell of fresh pine wafting through the air. Okay, I think to myself, let’s start cutting. I get the miter saw going, and the sound of the blade cutting through the wood is oddly satisfying. However, I underestimated how quickly I’d have to measure twice (or maybe thrice).
The Beautiful Miscalculation
With the first piece cut, I thought, “Hey, this is cake.” But I neglected to realize just how crucial accuracy was at this stage. I remember measuring for the second piece and feeling like I was in a math class—3 inches plus the blade width, minus the overhang… After a few tries, I finally threw caution to the wind, hoping my gut instinct was right. I hit ‘cut’ and watched the saw do its thing.
But wouldn’t you know it, I ended up with a pair of completely mismatched pieces. I almost tossed the tape across the garage in frustration. I mean, come on! It’s just a shooting board!
The Glue Fiasco
Once I finally got my pieces to the right size—sort of—I was ready to glue them together. The instructions said wood glue was my best friend, but I figured I could save a few bucks and use that old bottle of Titebond I had from last winter. Because if I’ve learned anything from this crazy hobby, it’s that you never throw out old glue; you simply let it sit there—kinda like those socks I keep thinking I’ll eventually wear.
So, I spread that glue like it was icing on a cake. I even got a little cocky and decided I’d clamp it down with some of my trusty quick grips, thinking I was in the clear.
But, sure enough, I left the clamps on too long. I got distracted, maybe by a dog barking outside, and when I finally came back—let me tell you, there was no way I was going to pry that wood apart. I laughed a bit when I realized I had to completely sand down certain spots because of that glue squeeze-out. Should’ve seen it coming!
The Moment It Worked
Fast forward a bit, and after a good few hours of me going back and forth, I had most of my shooting board in place. I set it up to give it a test run, and instantly, I was almost prepared for it to flop. But to my surprise, the plane glided over the wood like a knife cutting through butter. I couldn’t help but laugh at how much time and effort it took—for the first five minutes, at least.
You know, there’s a particular high you get when you finally get it right. Just sitting there in my garage with that oil smell and the sound of wood shavings hitting the floor, it kind of made the whole ordeal worth it.
Reflections on the Journey
After finishing up, I felt a strange kinship with that shooting board. Its imperfections told a story—a story of miscalculations, misplaced glue, and a bit of hard-earned perseverance. Every flaw was a reminder that I’m just a regular guy who loves working with his hands, and that it’s perfectly okay to screw up along the way.
So yeah, if you’re thinking about diving into a project like this, take it from me: don’t stress too much over the little things. They’ll come together one way or another. You’ll have trials—maybe a few mess-ups, but that’s just part of the learning curve.
Grab that piece of wood, fire up the saw, and just go for it. You might just end up with something beautiful… and even if it’s not perfect, it’ll be yours. And isn’t that what really counts?