A Kitchen Island Adventure
So, there I was, perched at my kitchen table one Sunday morning with a steaming cup of coffee in hand, staring at my kitchen—a space typically so cozy but felt a bit cramped and, well, missing something. That’s when the idea hit me: a kitchen island. Nothing too fancy, just something to add a bit of space and maybe some extra seats for when the family comes over.
You see, I’m not a professional woodworker. I’m just a small-town guy with a garage full of tools and a general penchant for mischief. Okay, it’s not mischief; it’s more like “let’s see if I can figure this out” kind of attitude. So naturally, I decided to tackle this kitchen island project myself. What could go wrong, right?
The Start of Something Big
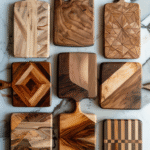
I started by drawing up some plans. I wasn’t trying to be all architectural about it—just some rough sketches on a piece of scrap paper. But boy, was I optimistic! I thought, "How hard could this really be?" So, I headed to my local lumber yard, armed with nothing but a vague idea and, frankly, a slightly thick wallet. I picked out some nice oak because it has that beautiful grain and a solid feel to it. Plus, the smell of fresh-cut oak—it’s like heaven.
I loaded the wood into my truck, the rough texture of the boards scraping against my fingertips. I felt like I had a solid plan in my hands…until I got home and realized my “simple” design was about to become less simple.
Reality Sets In
First hurdle: cutting those boards. I had a table saw and a jigsaw, but I started with the table saw. And because I’d read something online about safety (“always use push sticks”), I started to feel a little too confident. Let’s just say my push stick and I had a brief but intense relationship. One minor miscalculation, and wood went flying! I realized pretty quickly that math just isn’t my strong suit.
Somehow, I managed to cut everything down to size without losing any fingers. But in my eagerness, I mismeasured a couple of pieces. I didn’t want to admit it at first, but there I was, gazing at two stumpy legs when I was supposed to make a full island!
It took me a moment, leaning against my workbench, to swallow my pride. I laughed a bit as I sat there, looking at the remains of my little oak fiasco. Had I really thought I could just eyeball the whole thing? Ugh.
Lessons in Patience
After a couple of days cooling my heels, I went back to the lumber yard, picked up some more wood, and decided to take it slower this time. Like they say, measure twice, cut once. Or was it three times? Anyway, it worked! By the end of the second week, I had assembled the main body of the kitchen island. Believe me when I say that when I finally fit all the pieces together, it truly felt like I had birthed some fine piece of furniture.
But then came the staining. I used Minwax’s Early American stain. Oh man. As soon as I opened that can, the smell just filled the garage. It had that rich, deep scent that made me feel all crafty inside. I even blasted some old country tunes just to set the mood. I set the pieces out to dry and, well, let’s just say my excitement got the better of me.
I impatiently started to move things around, only to leave for a quick run to the hardware store to grab some hinges. Well, upon my return, I tripped over the extension cord and knocked one of the freshly stained panels to the ground. There was no way to salvage it—it had a lovely splatter of industrial-grade dirt right across it. I almost gave up at that point, thinking this kitchen island was bound to end up as a pile of firewood.
The Final Push
But with some grit and determination (and more than a little coffee), I pressed on. I eventually managed to refinish that one piece, and with a little luck, it matched the others well enough. The final cherry on top was fitting some stylish drawer pulls—all from a local shop, of course.
Finally, the pièce de résistance: I wheeled that kitchen island into place and stood back, hands on my hips, just staring at it. It was far from perfect, but it felt like my heart was in every notch and screw. I poured some lemonade and called up my fam for a dinner gathering.
A Warm Ending
As I stood there, watching everyone gather around the island the first time, laughing and sharing stories, I realized that despite all the bumps and hiccups along the way, I had made something more significant than just furniture. It pulled my family together, just like I hoped it would.
Every scratch and misalignment told a story. If you’re thinking about trying something like this, I say go for it! Sure, you’ll probably trip over tools and stain your socks, but at the end of the day, you’ll have a project that’s uniquely yours. And that, in itself, is worth a little chaos. At least, that’s what I tell myself every time I look at my crookedly built kitchen island, now humming with the sounds of laughter and love.