Building a Wine Rack: Lessons from My Garage
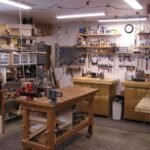
You know, there’s something therapeutic about woodworking. Just you, some tools, and this raw material waiting to be transformed into something beautiful. The other day, I was sitting in my garage with a cup of coffee—my usual Saturday morning ritual—and the idea struck me: I needed a wine rack. Not just any wine rack, mind you, but one that captured that rustic charm you see in the fancy magazines, yet something I could craft with my own two hands.
I had a few bottles of wine from that local vineyard down the road, you know—the one where they have the tasting room decorated with those twinkly lights? Yeah, those bottles were piling up on my counter, and I thought, “Why not give ‘em a proper home?” So there I was, all excited about my new project.
A (Somewhat) Good Start
I picked up some pine wood—a nice, light-colored piece that I thought would look good with a bit of that natural finish. Honestly, I loved the smell of that fresh wood when I took it out of the store. It almost felt like I was carrying a piece of summer with me. Took it home, and I was ready to rock.
Now, I’ve built my fair share of projects, but let me tell you, the wine rack was a bit of a leap. I started sketching it out, sketching being a loose term for what looked more like doodling. But hey, at least I had a vision, right? I decided on a classic “A-frame” design—it felt easy enough. My trusty circular saw, a miter saw, and a power drill were my go-to tools for this little adventure.
The First Hurdle: Measurements
I grabbed my tape measure, feeling all professional, but you know how that goes. The first mistake? I measured wrong. I was so excited that I rushed it and ended up cutting the wood a good two inches too short. I stood there, staring at the pieces, and I actually chuckled a bit. Like, “Oh great, the wood isn’t even tall enough for a bottle of Chardonnay.” I almost gave up right then and there. Isn’t it funny how one little mistake can throw you off your game?
But after sipping more coffee and contemplating life (as one does while staring at discarded wood), I figured, “Okay, let’s pivot.” I used what I had and just decided to make the rack a bit shorter than I originally planned. Turns out, once I put it together, the smaller size ended up working well for my kitchen space, so maybe it was a happy accident.
Construction Chaos
As I started piecing it together, I was seriously surprised by how quickly it began to take shape. The sound of the drill mixed with the smell of sawdust and fresh wood was oddly comforting. It reminded me of my dad’s workshop back in the day. That was where I learned most of what I know, stealing glances, and sometimes having him encourage me to use the tools—mostly, the ones he didn’t want me to break.
But, it wasn’t all smooth sailing. When I got to the part where I needed to attach the shelves for the wine bottles, I realized I had no idea how much space to leave between them. Like, how do you even gauge how much room a wine bottle needs? White or red? I took a wild guess, and you know what? I ended up with enough space for a bottle…and a half—which, sure, sounds fitting if you’re running late to dinner.
Dust and Doubt
At one point, as I sanded down the edges, I was staring at the mess I’d made in the garage and the pile of sawdust that was basically the size of a small dog. The thought crossed my mind, “Why am I even doing this?” But then, I got a whiff of that fresh wood smell again and reminded myself that this was more about the process than just the outcome.
By the time I reached the finish stage, it felt like I had built more than just a wine rack; I’d created a little haven, a scrap of time spent away from the noise of daily life. I used a clear polyurethane finish, and watching that shine set on the wood was like seeing the first rays of sunshine after a long winter. I laughed when it actually worked, you know?
The Moment of Truth
Finally, I got it all together. I stood back to admire it—proud as a peacock. It was far from perfect, with a few mishaps here and there, but it was my mishaps. I could see every mistake, but it felt like they all added to the character of the piece. It fit snugly in my kitchen nook, and when I placed those bottles in, I swear they looked happier than they ever did cluttering my counter.
You wouldn’t believe how much it brightened up the place. Tucking a few fairy lights around it only made it more charming, and I even caught my wife smiling at it, shaking her head like, “Who knew you had it in you?”
Takeaway from the Journey
So here’s the thing: if you’re sitting on the fence about jumping into something like this, just go for it. It might feel overwhelming, and there’s a good chance you’ll mess up (or three), but those are the moments that turn your project into a story. You learn a bit about yourself and maybe about your ability to create something worthwhile.
Life’s too short to let a few mistakes hold you back. What you make will be imperfect, but it’ll be real, and that’s the beauty of it. And who knows, maybe your wine rack will end up being the centerpiece of your dinner parties—or at least a great place to keep the half-finished bottles from your last gathering. Cheers to that!