A Journey into Danish Modern Woodworking
You know, there’s something almost magical about the way woodworking pulls you in. It’s like you start with a chunk of wood, maybe a nice slab of walnut or oak, and suddenly you’re amidst chips flying everywhere, the scent of fresh-cut timber filling your nose, and the faint hum of the table saw in the background, almost like it’s sighing with contentment. I remember my first real venture into Danish modern woodworking, and boy, what a ride that was.
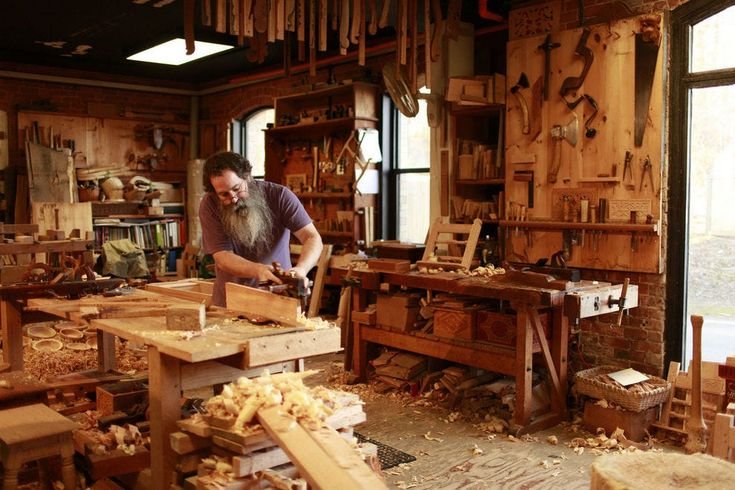
Now, I’ve always admired the clean lines and simplicity of Danish design. It’s minimalistic, but with that cozy, lived-in feel. I mean, who wouldn’t want a little slice of Scandinavia sitting in their living room? So one day, I thought, “Hey, why not give this a shot?” I was living at my parents’ place (you know how it is), just before I had my own little space. Their garage was my makeshift workshop, and everything was in slightly questionable order – tools scattered about, the faint rust smell of neglected equipment lingering in the air. But hey, it had character!
So I rolled up my sleeves and decided to make a simple little coffee table inspired by those sleek Scandinavian designs. I had a rough idea in my head, and with a hefty dose of courage and a cup of coffee that went cold, I started sketching out my vision.
The Tools and the Chaos
Now, tools—let’s talk about those for a sec. I grabbed my trusty circular saw, an old but reliable machine, and a jigsaw that I’d gotten from a yard sale years back. Sure, it didn’t come with all the fancy bells and whistles, but it had soul! Plus, it was nice and lightweight, easy to manipulate, you know?
I picked up some beautiful cherry wood for this table. When I walked into the local lumber yard, the aroma hit me like a wave. There’s this unique sharpness in hardwoods, almost like nature’s own perfume, and I couldn’t resist. But cutting that stuff wasn’t easy; cherry is dense, and my saw had a tantrum halfway through one cut. I almost gave up then and there. I remember just staring at that wonky cut I’d made, breathing in the wood dust, wondering if I was in over my head.
A Lesson in Patience
So, instead of throwing in the towel, I took a deep breath and decided, wait, maybe I can salvage this. I carefully measured again, took my time—you know how they say patience is a virtue? I wish someone had told me that earlier. Sometimes, being in a rush can lead to a patchwork table that looks more like modern art than functional furniture!
Once I re-cut the pieces, the time came to join them together. I used some biscuit joints because they seem to be the heart of any good woodworking project, right? (At least, that’s what the YouTube videos told me.) I remember applying the glue, and it was like I was bonding more than just wood; it felt like I was really putting my heart into it. It’s funny how, while clamping everything together, I realized how much I’d invested emotionally into this thing.
That night, the table sat there waiting for me, clamped up like a secret nobody could see yet. The next morning, I couldn’t contain my curiosity. I remember sitting there, coffee in hand, clicking away at my laptop, but every once in a while glancing over at it. There’s just something so raw and beautiful about unfinished wood, don’t you think?
The Surprise Twist
So, I finally took off the clamps, my heart racing like I was waiting for an acceptance letter rather than revealing a piece of furniture. And you know what? It actually worked! It wasn’t perfect, mind you—there were some gaps, a few rough edges—but it stood! I laughed when I realized that with all the mistakes and miscalculations along the way, it still came together.
Now, sanding was another story. If you haven’t sanded wood before, let me tell you: it’s a workout. I mean, I can still feel the burn in my shoulders from that day! Those final touches were crucial. I used some fine grit sandpaper and it felt like I was buffing those imperfections away one stroke at a time. With each pass, I found myself staring at it, imagining how it would look in its new home, adorned with books, coffee mugs, and who knows what else.
The Finish Line
After a few coats of Danish oil—because the irony isn’t lost on me—there it was, sitting proudly in my living room. It didn’t just look good; it felt like a memory. It reminded me that in the mistakes and the chaos, there’s beauty. Each scratch, each imperfection became a part of its story.
Reflecting back, I realized something important. Sometimes, you’re gonna mess up, and that’s okay. Things will go sideways; saw blades will get stuck, wood will chip, and you’ll have moments of doubt. But those moments are just part of the process that makes the final piece all the more meaningful.
If you’re sitting on the fence, wondering whether to dive into woodworking yourself, just go for it. Don’t stress about getting it perfect, ‘cause, trust me, most of the time it won’t be. Instead, embrace the mess, enjoy the journey, and know that each project will teach you something. After all, we’re all just trying to build something meaningful, aren’t we? Cheers to that!