Shaker Dresser Woodworking Plans: Tales from the Garage
So, there I was, sitting in my garage, coffee steaming in my favorite mug, listening to the hum of the wind through the cracked window. It’s that early Saturday morning bliss, you know? Just me and my thoughts. I had this grand notion—a Shaker dresser was going to spring to life from my imagination and into the very wood I had stacked against the wall.
The Inspiration Strikes
I’ve always loved the simple elegance of Shaker style. You’ve got those clean lines, the craftsmanship that screams “I did this with my own two hands,” and, of course, the storage. I’ve got a mountain of old clothes and a kiddo who seems to multiply toys like rabbits. The idea of building a dresser that could tackle that problem was pure gold.
But, man, I had no clue what I was getting into. At that moment, armed with a cup of coffee and a sketch on a napkin, I thought, “How hard can it be?” Oh, sweet summer child me.
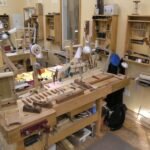
Gathering Tools and Wood
First, I hit up the local hardware store. Let me tell you, that trip was an adventure. I walked in with the slight swagger of someone who’s about to undertake a masterpiece and left with a cart full of oak boards, a new set of clamps—don’t get me started on the beauty of a good clamp—and a random assortment of screws, because why not? I figured I might as well grab whatever that might come in handy later. They always say, “You can never have too many screws,” right?
When I got home, it hit me. I needed more than just the wood and tools. I had my trusty circular saw, but this wasn’t gonna be a quick job. Nope, I needed my router, too, for those lovely edge details. I imagined the smooth sound as my router hummed along the edges—so satisfying.
But of course, when I grabbed it, I realized I hadn’t used it in months. Dust covered everything like a blanket of shame. There’s nothing like the smell of old sawdust to remind you of unfinished projects.
First Missteps
Now, you’d think measuring would be the easy part. Just pull out that tape measure and go to town, right? Ha! I can’t tell you how many times I measured wrong. I’d cut a beautiful piece, only to realize I misread that napkin sketch. “This is supposed to be 42 inches, not 48!”
After a few rounds of measuring, cutting, and several muttered curse words that would make my mother blush, I finally had the pieces laid out. They looked pretty decent — like a jigsaw puzzle that was just missing a few crucial pieces.
I remember holding the sides together and nervously checking if they would actually fit. I almost gave up at one point when I couldn’t get my joints flush. But then I gave it one last good push, and it was like a magic moment when those pieces fell into place. I smiled like I had just solved a Rubik’s Cube.
The Assembly
As I assembled it, I found my groove: glue, clamp, repeat. The smell of that wood glue is something else—it’s like the earthy embrace of craftsmanship. There were pockets of sunshine that filtered in through the window, and I felt a wave of calm as I pushed the dresser into shape.
But not everything went smoothly. Oh no, the drawers became the bane of my existence. I was supposed to make them glide effortlessly, but somehow, I ended up with a drawer that wouldn’t close without an Olympic-level shove. When I finally managed to get the slides right, I laughed when it actually worked. It went from a stubborn clunk to a smooth glide, and I felt like one of those wizard builders you see in YouTube videos.
The Finishing Touches
Once assembled, I got to the finish—the cherry on top. I decided to use a natural stain with a satin finish. It’s always a little nerve-wracking when you get to that stage. One wrong move and your masterpiece could look like a five-year-old took a paintbrush to it. But I poured it on gently, and watching it seep into the wood felt almost holy. That rich, warm scent filled the garage, and I couldn’t help but smile.
Fast forward to the moment of truth, when I pushed the dresser into place in my son’s room. It fit perfectly, like it was always meant to be there. I glanced at my boy’s eyes—it was pure wonder, and honestly, that moment made every blunder and bad measurement worth it.
Lessons Learned
In the end, the Shaker dresser, while not perfect, became a labor of love. I learned that woodworking is just as much about patience as it is about skill. I had to remind myself that it’s okay to mess up and that sometimes, the quirks and the imperfections are what give a piece character.
So, if you’re thinkin’ about tryin’ something like this, just go for it. Don’t let the fear of mistakes hold you back. Just let your imagination take over; embrace those little failures and learn from them. And who knows? You might find yourself with a new favorite spot in your home—a place to hold the memories, both yours and your little ones’.
Happy woodworking!