A Journey into Mission Style End Tables
You know, sitting here with my cup of coffee in my old garage, I can’t help but smile thinking back to my first adventure into woodworking — specifically trying my hand at crafting Mission style end tables. Ah, Mission style, with those clean lines and sturdy frames, those gorgeous rich woods… I always thought they were pretty classy, and it felt like a good project to tackle. But, whew, what a ride it turned out to be!
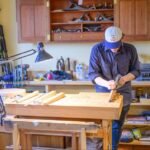
Now, I’m no professional carpenter. I just dabble when I get the chance. You know, after work when the sun’s about to dip behind those tall pines in my backyard, casting everything in that golden glow. It feels peaceful out there, with nothing but the sound of the wind rustling the leaves and a few birds chirping their evening songs. Perfect for woodworking, right?
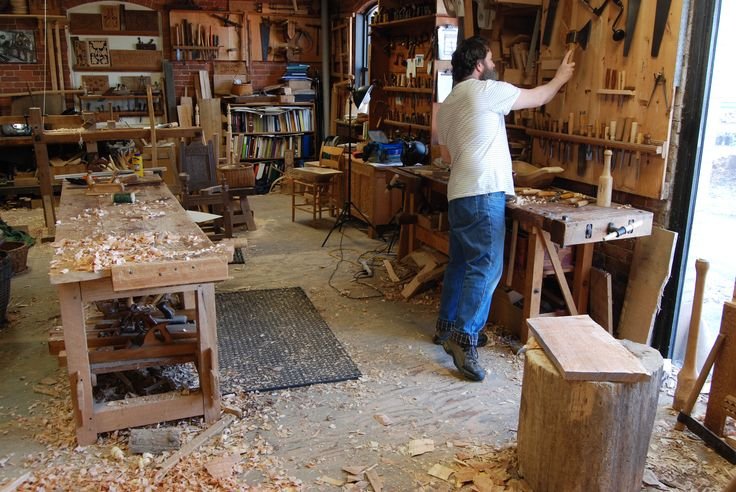
But here’s the thing: peace doesn’t always translate to smooth sailing. The first day I stood in my garage with my tools — an old circular saw, a drill, and my trusty sander — I was ready. I had my plans spread out on the workbench, coffee in hand, but boy, oh boy, was I mistaken about how straightforward it would be. I thought, “How hard can it be? Just cut some wood and throw it together!” Ha!
Pretty naïve of me, honestly.
The Wood Type Dilemma
So, I marched on over to the local lumberyard, where the smells of fresh pine and cedar hit me like a nostalgia train. I mean, can you remember that smell? It’s heavenly. I ended up picking quarter-sawn oak because, well, it just looked stunning on the rack. The grain patterns were mesmerizing, and the way they shone under that fluorescent light… it was love at first sight.
Now, here’s where I stumbled. I thought I could wing it with estimation, not bothering to get all my measurements down before cutting. Don’t laugh too hard, but I cut the first piece an inch too short. Just like that, what was supposed to be the main frame of my table turned into a sad little scrap piece, waiting to be turned into kindling. It was at that moment I almost threw in the towel. I stood there looking at that tiny piece of oak, feeling like maybe I was a bit in over my head.
The Learning Curve
But after a deep breath and a strong sip of coffee, I figured I’d give it another shot. I sat down and actually read the plans this time. Funny how that works, right? Turns out, you can’t just eyeball everything and expect it to go smoothly. Anyway, I measured again, cut again, and finally had the pieces I needed.
Now, let me tell you about the assembly part. Ah, good ol’ wood glue and clamps! If I had a dollar for every time I got glue all over my hands, I’d be set for life. It was like wrestling with a slippery fish — trying to keep the clamps on while all that sticky stuff was drying. I remember one time, feeling pretty confident, I started tightening the clamps and managed to send my whole assembly skittering across the table. I kind of laughed, thinking about how I must’ve looked: a grown man wrestling with wood like it was a wild animal.
And then there was the sanding. Oh, the sanding! The sweet smell of freshly sanded wood is so satisfying; it’s like aromatherapy combined with good old-fashioned elbow grease. I’d used my electric sander at first, but by the end, I realized the finer details needed a little handwork. So, I switched to my hand sander and ended up feeling the grain under my fingertips. It was labor-intensive, but there was something calming about it — like a meditation of sorts.
The Moment of Truth
Finally, after hours of work, a ton of adjusting, and some rather amusing moments, I stood back and looked at the legs of that end table. The assembly finally came together. I sat down, maybe cracked open a cold soda, and just gazed. That feeling when it all actually worked? It’s hard to describe. You feel a little burst of pride mixed with disbelief. Almost like a miracle had happened right there in my garage.
After a bit of varnishing — and boy did I learn to wear a mask for that! — it was complete. The end table stood there, proud as a peacock. I had even managed to get the mortise-and-tenon joints kind of right!
A Lesson in Patience
Looking back, I learned a couple of things through this whole process. First off, patience is key. And, well, maybe read the plans twice before jumping in! It’s funny how this stuff can seem so simple and yet throw you so many curveballs.
If you ever decide to take on a project like this, just know — you’ll end up with a little more than wood and glue at the end of it. You’ll have moments of doubt, triumph, and just a few funny stories to share.
So, if you’re thinking about trying your hand at Mission style end tables, or any project really, just go for it. Dive in with your coffee, your tools, and your own flair. You might stumble along the way, but trust me, the end result is worth it. And if nothing else, you’ll have a story to tell over coffee in your own garage someday.