The Bowtie Saga: A Woodworker’s Tale
So, one Saturday morning, coffee in hand and the sun just peeking over the barn, I decided it was time to tackle a new project. You know how it goes—those little ideas pop up in your head while you’re staring at the beautiful mess that is your garage? Well, I had been thinking about adding some bowtie inlays to a table I was working on. Bowties, or “Dutchman” joints as some folks call ’em, are these neat little shapes that reinforce cracks and just look pretty classy if I do say so myself.
But man, they’re tricky. At least, they were for me.
The Search for the Perfect Template
I hopped online, thinking I’d find the perfect bowtie template. Just a little PDF to print, boom, job done. But after scrolling for what felt like an eternity, I realized that all the templates I found seemed… well, cold? They lacked that charm, that warmth that comes from figuring it out yourself. So I ended up making my own template out of some scrap plywood.
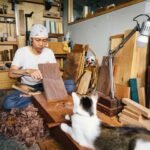
Now, let me tell ya something—there’s a certain smell to freshly cut wood that can bring you right back to the first time you picked up a saw. Honestly, it’s intoxicating. I fired up my jigsaw, this old DeWalt I inherited from my dad, and the whir of the blade filled the garage. I can still hear the sound of the wood vibrating as the jigsaw cut through it. It felt like magic, the way the shavings flew everywhere, sticking to my arms and arms like tiny badges of honor.
The First Cut
After a few deep breaths and a little more coffee, I finally had my template. And just when I was starting to feel like a woodworking pro, reality threw me a curveball. When I placed the template on my beautifully grained walnut slab, I realized I had not thought about the orientation or size. I measured twice, cut once, yet somehow ended up with a shape that looked more like a cat’s paw than a bowtie. I swear I could’ve laughed and cried at the same time.
I almost gave up right then and there. I mean, how hard can it be to make a bowtie, right? But my stubbornness kicked in, and I decided to give it another shot. After a little quiet contemplation (also known as pacing the garage with my coffee), I adjusted the size and made a fresh template.
Overcoming the Setback
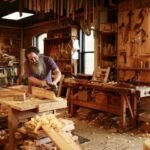
Things started to click after that. With the new template in hand, I cut the bowtie shape again. That cutting sound—the sweet melody of a second chance—felt satisfying. I was careful this time, making sure to line everything up properly, double-checking my measurements. And you know what? When I finally chiselled it out and saw that little bowtie inlay fit snugly into the crack of my table, it felt like I had just hit a home run.
But let’s not pretend it was all smooth sailing. The fitting wasn’t perfect. I could still see some gaps, and my heart sank. “What now?” I thought. It was almost as if the wood was laughing at me, mocking my struggle.
Then, I remembered this trick my neighbor Clyde taught me, bless his heart. He uses wood glue mixed with sawdust for those pesky gaps. With a little patience—and a lot of finesse—I filled in those holes and smoothed everything down. That smell of glue mixing with sawdust, oh man, it reminds me of working late into the night with the shop lights dim, just me and my projects.
A Moment of Doubt
As I waited for the glue to dry, I started questioning why on Earth I took on this project in the first place. I could’ve just sanded that crack and called it a day. But something deep down was pushing me to see this through. I’m not just building furniture; I’m creating a story, my story, one piece at a time.
When I finally returned to it, I sanded it down and, folks, let me tell you, that little bowtie came to life. Almost like it was saying, “Hey, it’s okay. You figured it out!” The wood grain popped against the finish, and I just stood there, coffee in one hand, looking at my creation like a proud parent.
The Finished Product
When the table was finally complete, and I set it in my family room, I couldn’t help but feel that all the frustration had been worth it. Family and friends came over, and I watched them admire it. They would run their fingers along the bowtie inlay, and they’d ask, “Wow, how’d you do that?” And I got to share my little tale of determination, trial, and error—all while sipping my coffee.
Final Thoughts
If you’re thinking about trying something like this, just go for it. Seriously. It might be messy, you might hit a few snags, but those moments? They turn into memories. There’s something raw and real about crafting something with your hands, like each piece holds a bit of your story—and isn’t that what life’s all about? So, grab some wood, some tools, and pour a cup of coffee. You’ll be surprised what you can create.