Wood Shelf Brackets: A Crafty Adventure
So, let me tell you about this little woodworking venture I embarked on a few months back. You know how it is—one moment you’re sipping coffee, and the next, an idea sparks in your head like a firefly at dusk. I had been staring at this wall in my living room, real drab and blank, and thought, “You know what this space needs? Some shelves.” And obviously, those shelves needed brackets, and hey, why not make them myself?
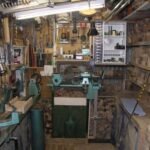
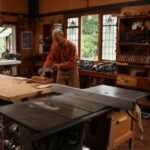
Now, I’ve dabbled in woodworking for a few years, mostly tinkering in my garage with the tools I’ve accumulated over time. I’ve got a trusty old table saw that’s just loud enough to send my dog running for cover, and a router that smells like burnt wood every time I use it. I love the smell of fresh-cut wood—there’s something about it that feels, I don’t know, reassuring? But anyway, I was all fired up about the idea of making my own wood shelf brackets.
The Planning Stage…Kind of
I figured I’d start simple, you know? Just some straightforward L-shaped brackets. I grabbed a couple of 1×4 boards from the hardware store—nothing too fancy, just some pine. I love the look of oak, but my wallet doesn’t, so pine would have to do. And it was actually a big step for me because I usually avoid those projects that feel like they might get too complicated. Being a bit of a perfectionist, I wasn’t sure about my ability to pull off something that looked good enough to actually hang my books on.
But hey, who said fear should stop us? That’s not the small-town way. So I drew up some plans on the back of an old grocery list, figuring I’d get to it the next evening after work.
Diving In—Oh, the Mistakes!
There’s always that moment when you realize that your plans in your head don’t quite align with reality. I got everything set up, and despite my initial confidence, I started cutting the wood. The table saw roared to life, just like I remembered it—only this time, it felt different. I was a bit rushed and maybe a little too eager. So, of course, I made my first cut and realized I had measured wrong. Instead of a solid, perfect bracket, I had a sad little piece of wood that was a good two inches short.
I almost gave up right then and there. I slumped into my garage stool, staring at that pathetic cut and thinking, “Why do I insist on doing this?” But then I breathed—deep breath in, deep breath out. I thought about all those times my granddad used to say, “Son, the beauty is in the messiness of it all.” And you know what? That’s true.
Adjusting the Game Plan
So I redid my measurements and started again. It took me a couple of tries, but eventually, I had two perfect cuts that could actually be considered brackets. I even got to use my new favorite tool—a pocket hole jig—this fancy contraption that allows for some neat hidden screws. The click of the jig felt satisfying, like a small victory each time.
Once I assembled the brackets, I sanded them down, which felt therapeutic. The switch from rough to smooth wood makes the world of difference, doesn’t it? And let me tell you, there’s something about wiping your hands on a towel after sanding. You get that sweet dust everywhere, and you can’t help but feel like you’ve accomplished something, even if you don’t really know where it will lead.
Finishing Touches
Now, the finishing part, oh boy. I wanted these brackets to pop, to look rugged yet stylish—something my friends might envy. I went for a dark walnut stain that promised to enhance the natural grain of the wood. When I opened that can, the smell was intoxicating, like walking into a cozy cabin in the woods. I brushed it on and, just then, I felt like an artisan mistaken for a common woodworker. The way the stain soaked into the pine transformed those little boards into something I could be truly proud of.
I let them dry, carefully holding myself back from touching them like a child waiting for a cookie to cool. “Patience,” I muttered to myself. I couldn’t screw this up again.
The Moment of Truth
Finally, after what felt like weeks but was probably just a few days, the time came to mount those brackets on the wall. I measured twice, made tiny pencil marks, and grabbed my drill. A sense of nervous excitement bubbled in my stomach as I secured the first bracket in place. The drill whirred, and each screw sunk into the wall felt like affirmation.
And when I placed that first shelf on top, I felt this wave of giddiness wash over me. I chuckled to myself because here I was, a kid who had barely passed shop class, now with homegrown shelving. It was sturdy, and it actually worked!
Wrapping Up the Journey
Now, every time I grab a book off those shelves, I smile, remembering the process rather than just the end result. I think that’s the beauty of woodworking in general—you can really screw things up, but when you finally get to admire your handiwork, it’s like a badge of honor.
So, if you’re sitting there thinking about making your own wood shelf brackets or even just starting a project, let me tell you—just go for it. Don’t overthink it. Dive in, make a mess, and embrace the learning curve. The little stumbles along the way just add to the journey. And who knows? You might just end up with something that holds not just your books, but memories of you overcoming a big ol’ DIY mountain.