Finding My Groove in Bible Stand Woodworking
You ever start a project thinking it’s gonna be a piece of cake, and then it turns into this whole thing? That’s exactly what happened to me with this Bible stand I decided to whip up one rainy Saturday morning. Spoiler alert: it didn’t exactly go as planned, but there were definitely some lessons learned, and a few laughs along the way.
The Bright Idea
So, I woke up with a cup of black coffee—strong enough to wake the dead, mind you—and I thought, “Why not make a Bible stand for the living room?” We had this old Bible lying flat on our coffee table, and honestly, it felt a bit sad, like it was begging for a throne of its own. I figured, how hard could it be, right?
I went deeper into my garage, where the smell of sawdust and fresh cedar lingered like a welcome friend. I’ve got a decent set of tools. Just your usual—miter saw, jigsaw, clamps, a few different sanders, and my trusty DeWalt drill. I mean, who doesn’t love the sound of a drill whirring? It’s like music, especially when you’re in beast mode.
Gathering the Goods
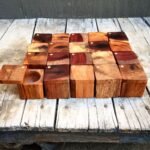
I strolled around local hardware stores, sniffing out some wood. I settled on some pine and cherry, thinking I could blend the two for a nice contrast. Pine’s pretty forgiving as a beginner’s wood, while cherry adds that rich color I was hoping for. Perfect, right? Well, we’re getting ahead of ourselves.
So, I got home and started sketching out my masterpiece. Or at least, I thought I was sketching a masterpiece. More of a lopsided scribble, really. I tried to visualize it all: a nice little cradle for the Bible to sit in, maybe some decorative legs to add a little flair.
The First Cut Isn’t the Deepest
Now, this is where things started to get a little dicey. I was feeling all confident, like I was some kind of woodworking pro. First cut on the pine was going beautifully, and then I flipped the board over for the next one… and bam, I sliced it wrong. Instead of a clean edge, I ended up with this weird jagged cut that looked like something out of a horror movie. I almost threw my tape measure across the yard, but all I could do was laugh.
“Okay, no biggie,” I told myself, but the doubt was creeping in. I thought about running to the store to buy a pre-assembled stand, but that just felt wrong. I meant to do this myself.
Little Wins Along the Way
I patched the cut as best I could, grabbing my wood glue and clamps. Honestly, the smell of that glue? It’s strong, but it has this vaguely comforting scent, like nostalgia mixed with frustration. And I felt a rush, you know? I was in the groove, finally. Once I got things clamped down, it looked like a piece of wood again, thank goodness.
Now, sanding! That’s where the fun did not really start. I was trying to smooth out the edges, and my palm sander decided to go on strike. It kept stopping mid-sand, like it had a mind of its own. I went through probably three sheets of sandpaper, and my patience was thinning like my confidence.
But then, right when I thought about giving up, I just gave it a little nudge, and miraculously, it whirred back to life. I swear, I laughed when it actually worked! I felt like I’d just reanimated a little zombie sander.
Getting Fancy with the Details
Then came the fun part—the finishing touches. I decided to stain it with a rich walnut finish, which made it look so much better than I ever expected. It was like magic, watching the color deepen as I wiped away the excess. The smell of that stain drifting through the garage reminded me of Sundays with my grandma, who always had something bubbling on the stove.
But let me tell you, I nearly had another hiccup when it came time to attach the legs. I’ve learned the hard way several times that measuring twice and cutting once is just not my strong suit. I ended up with one leg taller than the other, and I didn’t catch it until I set it upright. It was teetering like a drunken toddler, and could’ve easily knocked the Bible right onto the floor.
The Feel-Good Moment
After some creative adjustments—thank you, trusty wood shims!—I finally got the stand level. When I placed the Bible in its new home, it was like the heavens opened up. Honestly, seeing it all come together? It felt good. I even sat back and admired my handiwork, coffee in one hand, gratitude in the other.
Even my wife, who is usually more polite than honest about my projects, looked genuinely impressed. She said, “It’s beautiful honey, it really fits our living room.” That meant the world to me, you know?
Final Thoughts
So, all in all, the project took way longer than I planned, and it had me second-guessing my woodworking skills (which are pretty basic at best), but that’s part of the journey, right? I learned not only how to build something functional but also how to embrace the kookiness of it all.
If you’re thinking about trying something like this, just go for it. Don’t be afraid of the mistakes; they’re just part of the weird, messy beauty of creating something with your own hands. Trust me, you’ll look back and laugh, and it might just end up being one of your favorite pieces. Besides, life’s too short not to make a mess now and then, right?