A Journey in Mission Style: Crafting My First TV Stand
Well, let me tell you about the time I decided to build my own mission-style TV stand. I was sitting on the couch one lazy Saturday morning, sipping my black coffee—strong enough to put hair on your chest—when it dawned on me that I needed a TV stand. Like, a good one. The sort that screamed “I know what I’m doing” instead of “I just grabbed this off the clearance rack.” Plus, I figured if I could pull this off, it’d be a nice addition to my woodworking resume, or what you might call a “signature piece.” Ha!
So, I got the bright idea to dive into the world of mission style—a design that always resonated with me: those clean lines, the warm wood tones that just felt cozy, like a hug from your favorite flannel shirt. Of course, I didn’t have a blueprint or anything fancy like that. I just jumped into the deep end and thought, “How hard could it be?”
Picking the Right Wood… or Not
I rolled down to my local lumber yard, which has that familiar scent of freshly cut pine, a bit of cedar, and a hint of sawdust. There’s something magical in those smells, like a promise of the work ahead. I ended up picking oak because, well, it’s sturdy and has a lovely grain when finished. Plus, it just feels right for mission-style furniture.
I grabbed a few boards, mainly the 1-inch thick ones for the top and bottom, and then some slimmer stuff for the sides. Now, I’m talking about about 60 bucks worth of wood here, so I was already committed. I loaded it into my truck, heart racing with that mixture of excitement and a hint of dread. Am I really going to pull this off?
Tools and Tumult
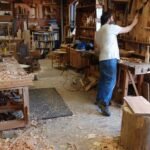
Back in the garage—a place that usually smells like a blend of sweat, gasoline from the lawnmower, and a hint of burnt wood—I gathered my tools. Just the usual suspects, really: a circular saw, a sander, clamps, and a drill. Simple stuff, but man, I tell ya, the air was electric with possibilities.
Now here’s where it got interesting. I had this vision in my head but translating that into actual dimensions? Well, that’s a different story. I almost gave up when I realized I had cut one of the side pieces too short. I stood there, staring at the board like it had personally betrayed me. Who knew one small mistake could feel like a massive failure? I paced around for a good ten minutes, shaking my head, muttering about how I should’ve just bought one. But then I thought: I didn’t want to be “that guy” who flaked on his project.
The Real Work Begins
So, I took a deep breath, slapped on some motivational music, and decided to make it work. I ended up using some scrap wood to extend that piece. Not my finest moment, but hey, that’s the reality of woodworking—learning to embrace those little hiccups. After some more cuts and a good amount of sanding, I felt like I was getting somewhere. I mean, the wood took on that rich, golden hue, and I could almost hear its quiet satisfaction as I polished it up.
As I assembled it, I used those clamps to hold everything in place. You know, it’s funny how much you rely on those things. They’re like the unsung heroes of woodworking, squeezing and holding everything just right. I found myself chuckling at how these little bandits made everything look so much better, really. In the chaos of my garage, it felt nice to find a sense of order, even if it was just clamped boards holding each other together.
The Finish Line – Almost
Now, the finishing touches! And let me tell you, this is where I really got excited. I decided on a dark walnut stain because I wanted that classic arts-and-crafts vibe. Opened the can, and oh boy, that smell swept over me like a wave—woody and earthy and good. I’ll admit I got a bit carried away and ended up slapping on three coats. Each coat just made that wood pop more and more. I mean, who knew I could be an artist with a brush too?
When I finally put the last coat of varnish on and stood back to admire my work, I almost couldn’t believe it was real. It felt like a rite of passage, like I was no longer just a novice in the garage, but someone who had created something beautiful.
A Lesson Learned
But you know, even after all that, there was a moment of panic there as I realized I had forgotten to account for the cable management! My heart sank. Did I really just build a beautiful stand to have a mess of cords hanging out? I had to chuckle because at that moment, I felt utterly defeated. But then I got clever and drilled a couple of holes in the back—problem solved!
Wrapping It Up
So there I was, standing proudly next to my mission-style TV stand, feeling like I had achieved something with a medley of emotions swirling inside me. I plopped down on the couch, and let me tell you, that first evening when I finally set my TV on it felt like I had crossed the finish line of a marathon. Sure, it wasn’t perfect—there are little uneven spots if you look closely—but that’s part of the charm, isn’t it?
If you’re thinking about trying something similar, just go for it. Don’t let the fear of mistakes hold you back. Every ding, every miscalculation just adds character. After all, sometimes the most beautiful creations come from those unexpected moments, right?