The Adventures of Building a CD Storage Cabinet
So, let me set the scene for you. I was sitting on my creaky old porch one rainy afternoon, sipping on a mug of my favorite black coffee—strong enough to wake the dead, mind you. And there it was: my collection of CDs, cluttered and chaotic, crammed into a corner of the living room like they were hiding from the world. I loved music, you see. There’s something about holding that shiny disc in your hand that feels way more real than streaming some pixelated melody through a screen.
I knew I had to do something about it. An old CD storage cabinet was the answer—the kind my granddad used to have, but a little more modern, maybe with a twist. I figured I could tackle this with some wood and a handful of tools. After all, woodworking was a bit of a pastime for me.
The Epiphany
Now, my first thought was, “This will be a piece of cake!” You know how it goes—this overly optimistic notion that any project will pan out the way you envision. That’s when I started imagining this sleek, stylish cabinet, something that would bring order to my little musical universe. I even sketched it out, not that I’m some great artist—more like a third-grader’s doodle. But you know what? For me, it was good enough.
I made a trip to the local lumber yard. You could smell the fresh-cut pine as soon as you walked in, intoxicating in its own way. I picked out some select pine boards, not too heavy, not too light—just enough to give it that sturdy feel while also looking nice. Also snagged some birch plywood for the back panel, mostly ’cause it was on sale.
Lessons in Reality
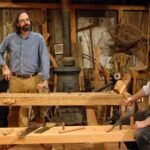
Alright, here’s where it gets real. I had this vision, but just starting proved to be an entirely different monster. My garage is cluttered with all sorts of odds and ends—this used to be my father-in-law’s workshop, and boy did he leave a footprint behind. I pulled out the ol’ circular saw, and it felt good in my hands again. But as soon as I ran that first cut, a little voice in my head tried to sabotage things: “What if I mess it up?” Let me just tell you, there’s nothing quite like the sound of a saw biting into wood. It’s therapeutic… until it isn’t.
Halfway through my first cut, I realized I hadn’t even measured the wood. Just eyeballed it, like I often do with my height when I’m trying to fit into old jeans. Guess what? Yep, I ended up with a wonky piece that looked like a toddler tried their hand at woodworking. I laughed and cried simultaneously.
That’s when I almost gave up. I stood there, hands on my hips, staring at that mess for a good fifteen minutes, feeling like such a failure. I even thought about throwing in the towel and just buying some flimsy plastic storage unit. But then I remembered all those CDs mocked me from their corner, and goodness knows I didn’t want them to win.
Rediscovering the Joy
So, I took a deep breath, set that scrap aside for what I hoped would be some kind of future project, and grabbed the measuring tape. Measured twice, cut once—classic mantra, right? This time, I took my time. And wow, that was freeing. Cutting pieces to exact measurements felt more like sculpting than building.
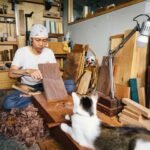
Once the initial panic subsided, the real fun began. I used pocket hole joints for the assembly, which I’d been dying to try out. Just the sound of the Kreg jig drilling those holes made me giddy. It felt like I was accessing some secret club. The smell of wood glue filled the air, and let me tell you, there is something oddly satisfying about clamping pieces together and seeing them hold.
And then it happened—I laughed when it actually worked. I mean, the whole cabinet started to take shape! I added a couple of shelves and designed the door with some simple paneling. Just enough to keep it personal, but not overdone.
The Finally Finished Product
After what felt like ages, I finally stood in my garage, wiped my sweating brow, and triumphantly looked at my completed cabinet. It wasn’t perfect—there were a couple of errant glue stains and a door that creaked just a little—but it felt like an extension of me. I made that. It held stories, memories, and an absurd number of 90s rock albums.
Bringing it into the living room felt like a little victory parade. I placed my CDs neatly, making sure they were organized by genre, because what kind of music lover doesn’t? I stood back and marveled at how something that once felt so overwhelming had transformed into a physical representation of my love for music.
The Takeaway
So, here’s the thing: if you’re ever thinking about diving into a project, especially one that feels daunting at first, just go for it. You might mess up a cut or two—maybe you’ll even have a wobbly shelf or an extra hole you didn’t intend to make. But that’s part of the story, isn’t it?
In the end, what matters is that you create something from your own two hands, something that has a little piece of you in it. I wish someone had told me that in the beginning. So grab some wood, put on your favorite tunes, and build something beautiful—even if it’s just a cabinet to hold those shiny discs. You won’t regret it. Cheers to that.