Crafting a Wooden Mallet: A Little Adventure in the Garage
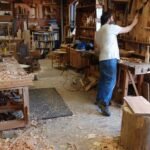
You know, sometimes the simplest projects turn into the most unforgettable adventures. Just the other day, while sipping my morning coffee—black, no sugar, just the way I like it—I got this wild idea to make a wooden mallet. You know, the kind that can take a beating without leaving a mark. I can’t tell you how many times I’ve been in the garage reaching for something, only to grab a hammer or worse—my favorite chisel—because I didn’t have a proper mallet. So, off I went, fueled by caffeine and a little bit of stubbornness.
The Perfect Piece of Wood
First off, you’ve got to find the right wood. Originally, I thought I would just grab some scrap pieces from the last project—old 2x4s and all that. But something was gnawing at me, and after a few minutes of berating myself for being cheap, I decided to go for something a little nicer: a chunk of hard maple. I’ll tell you, that stuff smells phenomenal when you cut into it—almost sweet, like that fresh cut grass in spring.
I remember sitting there in my garage, inhaling the scent and getting lost in thought. I could’ve just gotten something easier, something cheaper, but nah, I needed this mallet to last. So, I laid out the piece—my heart racing a bit with excitement, you know?
A Mallet in the Making
Now, I had all the plans floating around in my head like a whirlwind, picturing this mallet in all its glory. I grabbed my trusty miter saw, a Ryobi, and started cutting the wood. The sound of the saw buzzing filled the garage—it’s almost like music to my ears.
But then came the moment of truth. See, I wasn’t entirely sure about the dimensions. I wanted it hefty enough to pack a punch but not so heavy that I’d be flailing like a fool trying to use it. I marked it all up and cut what I thought was a solid chunk. And let me tell you, the first cut was… well, let’s just say, it wasn’t quite right.
A Bit of Clumsiness
I stood there, staring at my odd-shaped piece of wood, and thought, “Did I really just do that?” I almost gave up then and there. That’s the thing about woodworking, you know? There’ll be moments when you just want to throw your hands up and walk away. I mean, who needs a mallet anyway, right?
But then, after a few deep breaths and a bit of self-talk—like, “Come on, you can do this”—I found myself at the sander. Just a little bit here and there, trying to smooth things out. I used 120-grit to start, and man, that lovely soft scrape against the wood had a calming effect on my soul. Eventually, that lopsided mess started to come together into something beautiful, and I felt a spark of hope creeping in.
The Making of the Handle
Alright, so the head of the mallet was starting to look promising. Now, it was time for the handle. This part actually took less time than I thought—sometimes, the easier parts are the ones that mess you up. But this time, I had a little more confidence in me. I grabbed a piece of ash wood—felt like a warrior finding their sword, honestly.
I cut it down and got to shaping it. That sweet swing of the chisel against the grain—oh man! I couldn’t help but laugh when it actually worked. There’s something crude and beautiful about working with wood, shaping it into what you envision. It becomes a piece of you, doesn’t it?
Finishing Touches
So, after getting everything fitted just right, I thought, “Time for the finish.” I used some mineral oil—simple, but it brings out that grain like nothing else. I can practically feel my skin soaking in those wood oils; it smells delightful. Just standing there, admiring my little mallet, I felt a connection—not just with the wood, but with every mistake I’d made along the way.
You know how it is, right? The journey feels just as significant as the destination. Nearly giving up, messing up dimensions, and then suddenly getting it right—it’s all part of the deal.
A Moment of Pride
When it was finally done, I gave it a few solid whacks against my workbench. Each thud echoed through the garage, and there was a huge grin plastered on my face. I was a proud parent, you could say! I thought back to my past projects where I struggled, and now here I was, smacking some boards together with my homemade mallet. Who knew such a simple tool could come with so much pride and joy?
A Warm Thought to Share
So here’s the thing: if you ever think about tackling this little adventure of making a wooden mallet, just go for it. Don’t let the little mistakes or moments of doubt wear you down. That’s the beauty of it all—embracing the imperfections, the lessons learned, and every little victory along the way.
You’ll end up with something that’s not only functional but carries a story. And really, what’s better than that? I mean, let’s be honest: nothing beats the smell of sawdust and that satisfying thud of a handmade tool in your hands.