A Tale of Timber and Trials: My Gun Rack Journey
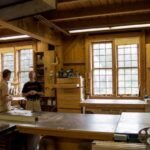
So, picture this: it’s Saturday morning, the sun is shining in that gorgeous, lazy way that makes you feel like each beam has its own personality. I had my cup of coffee in one hand and a gumption to build a gun rack rolling around in my head. Living out here in small-town America, a sturdy gun rack is basically a rite of passage. But let me tell ya, what started as a simple weekend project turned into a rollercoaster of mistakes, lessons learned, and more than a few choice words, if you catch my drift.
The Idea Sparking
Honestly, I just wanted something functional in my garage. My old rack? It was falling apart like an old barn in a storm. Every time I reached for my shotgun, I had this fear it was gonna tumble out and land right at my feet—kinda like a bad action flick. So, I did what any sensible DIYer would do: I scoured the Internet for free woodworking plans for a gun rack. And after some scrolling, nearly dunking my phone in my coffee from sheer excitement, I found a plan that looked promising.
Armed with that plan and a slightly nagging feeling that I might be biting off more than I could chew, I headed to the local hardware store. Ah, the smell of fresh-cut wood! It’s like my own personal paradise. I grabbed some pine lumber, not because I thought it was the best choice (though it’s cheap and easy to work with), but because it was what I could afford. Also, it’s light, and if things turned out wonky, at least I wouldn’t be lugging around heavy oak.
The First Cut
Now, here’s where things really kicked off. I laid everything out in my garage—my trusty miter saw humming like it was too excited to get started. I was feeling pretty confident until I realized I had no idea how to read the measurements properly. I mean, come on, numbers never were my strong suit. After a few, uh, “creative cuts” — which I didn’t think I would need a band-aid for — I finally got my pieces together.
Now, let me tell you, cutting that wood is one thing, but then there’s the sanding. Oh boy, the sanding. If there’s one lesson I’ll shout from the rooftops, it’s this: don’t underestimate the power of a good sander. The vibrations are kinda soothing, like you’re wrestling a grizzly bear but in a whimsical way. Just make sure you wear a mask—being covered in sawdust isn’t quite the aesthetic I was going for.
Moment of Doubt
So, after getting everything cut and sanded, I moved onto assembly. The plan had this fancy idea of using dowels and glue. “Easy-peasy,” I thought. I mean, how hard can it be? But when I tried to hammer those dowels in, they just wouldn’t cooperate. I almost gave up when I saw the wood splitting like some misguided nature documentary. There I was, sitting on my filthy garage floor, cradling my half-assembled rack, questioning if I’d ever hold my gun with anything resembling grace again.
It was a moment of truth, folks. Do I pack it all in and accept defeat, or do I channel every ounce of stubbornness that runs through my veins? Wouldn’t you know it, stubbornness won. A new plan materialized in my head, a little less ambitious and a whole lot more practical. I switched to screws instead of dowels — the ever-reliable hero of woodworking.
Assembling the Pieces
Once I put my new game plan into action, things began to click (literally and figuratively). The smell of wood and glue filled the garage as I saw everything come together. It was that magical moment where I felt like I was actually making something that resembled a gun rack and not just some abstract art piece destined for the dumpster.
I remember standing back to survey my creation, heart racing a little. The rack looked solid and almost—dare I say—professional. It was still a bit rough around the edges, but hey, so am I. I slapped on a coat of stain, and as the color deepened, so did my satisfaction. There was something beautiful about watching it transform. I chuckled as I thought about all the cajoling I’d done with the wood, like it was a stubborn horse.
The Final Touch
Then came the moment of truth: I slid my shotgun onto that rack like I was pinning a medal on a soldier. It fit just right! I mean, talk about a win! Despite all the hiccups, there it was. I felt a swell of pride, like I’d just won the local chili cook-off.
At that moment, I realized—every scrap, every word muttered in frustration, every drop of sweat—or maybe tears— have value. They’re part of the journey. So, do I think some fancy woodworking class would’ve made this easier? Maybe, but who needs that when you have good ol’ trial and error.
Final Thoughts
So, if you’re sitting there, contemplating whether to take on your own woodworking project—maybe something simple like a gun rack—grab that saw, find those plans, and just jump in. Sure, you’ll have moments where you think this was the worst idea ever. But you’ll also have those hours where the world fades away and all that exists are you, the wood, and the satisfaction of creating something with your own two hands.
In the end, it’s not just a gun rack; it’s a story, one filled with laughter, frustration, and a hint of triumph. And that, my friend, is worth every splinter along the way. So, go on, grab that wood, make a little mess, and most importantly, have a blast!