The Beauty of Free Woodworking Photos
So there I was, sitting in my garage one chilly Saturday morning, sipping on my lukewarm coffee and staring at a pile of oak and pine. I decided it was finally time to build that bookshelf I’d been dreaming about for ages. You know how it is. You’ve seen something online, maybe on Pinterest or Instagram, and your mind starts racing with ideas. Like, “I can do this!” And then, reality hits you like a two-by-four to the face.
But before I could get my toolbox out, I remembered something—a neighbor down the street had mentioned free woodworking photos online. Now, I won’t lie, when I first heard about “free photos,” I thought to myself, “What am I, a college kid writing a blog?” But, boy, did I get schooled on that idea.
The Search Begins
With my coffee getting cold (again), I grabbed my laptop, still messy from the last time I used it for a project. The smell of sawdust hung in the air, and I could hear the soft sound of the wind rustling through the trees outside. Nothing like a bit of nature to inspire creativity, right? So, I started searching. I typed “free woodworking photos” into my browser, and a treasure trove opened up before me.
You see, I’ve always been a more visual learner. If someone tells me how to do something, I nod and smile, but inside, I’m thinking, “Show me the pictures!” I stumbled across a bunch of images that showcased everything from dovetail joints to elaborate carved details that my unfocused brain couldn’t even comprehend.
And there it was—a photo of a rustic bookshelf that looked like it was lifted straight from an old cabin. The wood was rich, deep brown, almost glowing in the sunlight. I thought, “If only I could make something like that.”
Real-Life Struggles
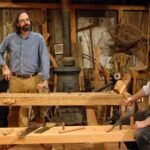
I got a little overconfident after looking at those polished pictures. I grabbed my miter saw—a trusty old school DeWalt, and I’ve probably cut my finger off a dozen times (don’t worry, just metaphorically). I thought, “No problem, I can cut these boards down to size.” But guess what? I didn’t measure! I mean, who needs to measure, right?
About three cuts in, I had pieces that were all sorts of different lengths, stacked haphazardly in front of me. My mouth nearly dropped open. I mean, one piece was so short it could barely hold a paperback book, much less the full set of encyclopedias I envisioned showcasing. I almost gave up in that moment, but then I thought about that beautiful picture of the bookshelf.
How could I make something close to that if I just called it quits? So I took a deep breath, put on some music—Zac Brown Band always does it for me—and I marched back to that stack of wood, determined to salvage what I had.
A Lesson in Adaptation
After kicking myself for being an amateur, I started brainstorming. Long story short, I ended up changing the entire design, accidentally turning it into a more compact piece, closer to what you’d call a “reading nook shelf” instead of the grand library I envisioned.
As I glued and nailed the pieces together—no fancy pocket hole jigs here, just good old wood glue and my nail gun— I felt that familiar thrill start to kick in. You know the one: that fleeting moment of joy when you realize what you’re working on might just turn out okay after all.
Funny enough, while gluing, I accidentally stuck my fingers together. You’d think I’d be embarrassed, but I couldn’t help but laugh. There I was, a grown man looking like a kid in art class, but hey, woodworkers, right? We know how to embrace mishaps.
Picturing the Finished Product
With my not-so-grand bookshelf finally coming together, I found myself back on the hunt for more woodworking photos. This time, I was searching for finishing tips—something that could make my amateur masterpiece look a bit more professional. And wouldn’t you know it? The same websites I found before were overflowing with beautiful finish ideas.
I learned how to use Danish oil to highlight the grain—oh boy, that smell! It reminded me of being back in elementary school, doing arts and crafts. The scent curled around me, wrapping me in nostalgia. Watching the wood soak it in, transforming the lifeless gray into warm honey tones—well, that felt like magic.
The Final Touches
By the time I added the last coat and stepped back, I felt like a proud parent. I couldn’t help but take a photo of it, even if my phone was a decade old and the camera was only passable. I followed it up with a touch of that gorgeous free woodworking photo style, posing the shelf with some of my daughter’s favorite books, journaling supplies, and family photos.
I’d made my mistakes, sure, but I had learned so much along the way. And, honestly, I realized it’s about the process; it’s about the little lessons and the laughter when things don’t go as planned.
The Takeaway
So the next time you’re feeling unsure—a bit like your woodworking skills are all over the place—just remember, we all start somewhere. Grab that free woodworking photos site and get lost in the inspiration. But don’t forget, the magic isn’t just in the final piece; it’s in every miscut, every glue fiasco, and those moments of joy that make it all worth it. If you’re even thinking about trying this, just go for it. You might surprise yourself. We’re all just a few mistakes away from something beautiful.