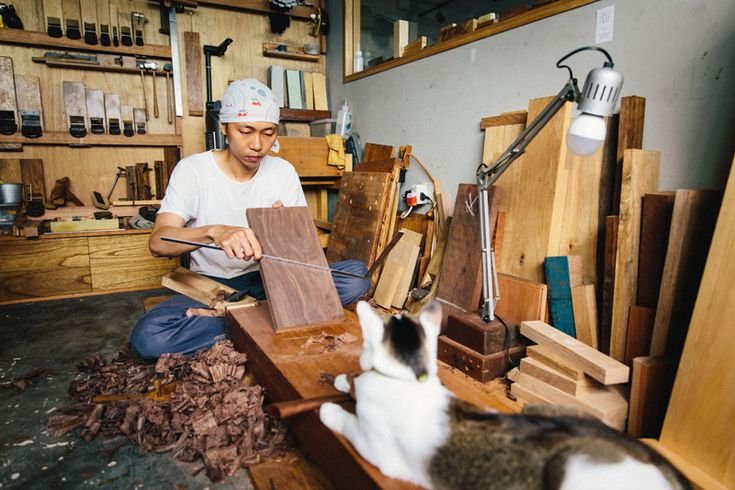
Woodworking Whims and Quilt Racks
Grab a cup of coffee, will you? Hot and strong—just the way it should be. You know, there’s something about a good cup of coffee and a chat that makes the world feel a whole lot better. So, let me tell you a little story about my latest woodworking adventure—building a quilt rack. Seems simple, right? Ha! Simple is a term I’ve learned to take with a grain of salt in this hobby of mine.
The Idea Strikes
So, it all started when I was rummaging through some old boxes in the attic. You know the type—full of dust and memories. I stumbled upon a quilt my grandmother made. It was a beautiful patchwork of muted blues and faded golds, and I’ll be honest, it took my breath away. But it was just sitting there, stuffed in a box like it wasn’t worthy of a better home. That’s when it hit me: a quilt rack! A nice wooden quilt rack to display her work. That’d do justice, I figured.
Setting the Scene
Now, I’m no Bob Vila, but I’ve got a few woodworking tools in my garage that I’ve collected over the years. You know, the standard stuff: a circular saw, a trusty old hammer, some clamps, and a pretty neat Miter saw I picked up for cheap at a yard sale. That’s probably my favorite tool—it’s like a magic wand sometimes, I swear.
So, off I went to the local hardware store, inhaling that familiar woodsy smell. I settled on some pine. C’mon, it’s light and easy to work with, plus that soft aroma of fresh-cut wood just drives me wild. I grabbed a couple of 2x4s and a nice long plank for the top. Figured that’d do for a start.
The First Steps
You know, when I first started on the rack, I thought I had it all figured out. Measured everything twice, cut it once—yeah, that’s the mantra, right? But for some reason, I forgot to account for the wood’s thickness when I was cutting the side panels. And let me tell you, when I put those pieces together and saw that the top shelf was hanging like a limp noodle? Well, I almost tossed it all into the fire pit.
But then, I took a deep breath. It’s just wood. I can fix this… Right? I laughed at myself a bit. That’s when I decided to take a step back. I grabbed my coffee—cold at this point, but who’s counting?—and sat outside for a minute. That’s when inspiration struck. I realized, hey, I could add some supports! So, I rigged up a couple of cross braces for the top shelf. A little extra wood never hurt anyone, right?
The Struggles Continue
Now, let’s get to the sanding and finishing part. Ugh. If I had a dollar for every splinter I got while sanding—I might’ve actually broken even on this project. I mean, who knew a seemingly innocent piece of pine could have so many hidden hazards? But, oh, the satisfying sound of the sander buzzing away, like a gentle hum that puts me in a trance.
After what felt like an eternity, I finished sanding and started staining it. I went with a walnut stain—classic, elegant, but not too dark. I’ll never forget that first whiff of the stain. It’s like entering a cozy cabin in the woods with the fireplace crackling nearby.
But this is where I tripped up again. I was a bit too eager and didn’t let the first coat dry properly. So, when I went to apply the second coat, it turned into a sticky mess. Great. I almost tossed the whole thing out right then and there. But, you know, sometimes it’s those little stumbles that get you thinking outside the box. I took a moment, scraped the goop off as best I could, and decided to embrace the imperfection. After all, isn’t that what handmade is all about?
The Big Moment
The real kicker came when I finally assembled the whole thing. I could almost hear the wood whispering, “You got this.” It was a tight fit, and I held my breath. I slid the last piece into place, tightened the screws, and, oh boy, it looked gorgeous! It might not have been perfect—a little wobble here, a rough edge there—but it was mine, and it held my grandmother’s quilt like it was the most precious treasure.
I put that quilt on display and stood back, feeling that warm swelling of pride. I thought about all the little moments leading up to this—every mistake, every laugh, and all the coffee breaks that somehow made it all worthwhile.
A Warm Takeaway
So, here’s the thing—if you’re thinking about trying something like this—don’t let the small stuff trip you up. Embrace the process; it’s part of the magic. Sometimes things don’t go as planned. Heck, sometimes they turn into messy disasters. But every little bit matters, and every mistake is a step toward getting better.
If I’d known back when I started that it was such a winding road full of twists and turns, I might’ve been less intimidated. But honestly? I wouldn’t change a thing. So, grab that wood, take a deep breath, and just go for it. You might just surprise yourself.


