
A Christmas Pyramid and a Small Town Christmas
You know, there’s something special about the holidays in our little town. The air gets crisp, you can smell pine and cedar everywhere, and on chilly evenings, the sound of laughter and holiday music drifts from every home. One of my favorite things to do around this time? Woodworking. I’ve always had a knack for it—or at least I thought I did until last Christmas, when I decided to take on a Christmas pyramid project.
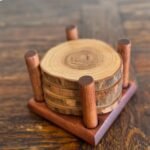
Yeah, I know what you might be thinking. “What’s a Christmas pyramid?” Well, it’s this beautiful piece of folk art; imagine a tiered structure with little candles and figures representing the Nativity or winter scenes. It spins around as the heat rises from the candles. I’d seen them online, thought they were just charming, and figured, “How hard could it be?” Just a bit of wood, some paint, and a few candles, right?
The Daring Idea
So, I grabbed a couple of 1×8 boards from my local hardware store—you know, the ones that always make that satisfying cracking noise when you first pull them apart. I don’t even remember what brand they were; I was just too excited to start cutting. I settled down in my garage workshop, which is really just an old, creaky place filled with smells of sawdust and saw blades. I had my trusty miter saw, a drill I wasn’t sure would hold up, and a sander that might as well have been a relic from the Stone Age.
I had this vision in my mind, all rustic and perfectly symmetrical. But truth be told, I wasn’t prepared for what was about to happen.
The First Cut Is the Deepest
Now, the plan in my head was pretty clear—back and forth between tiers, making sure everything lined up perfectly. But when I made my first cut, my saw sputtered like a cat coughing up a hairball. I mean, I didn’t even get halfway through the wood before it jammed. Panic settled in, but I pushed through, threading that blade again and saying a little prayer that the neighbors wouldn’t hear me yell at my tools.
After about an hour of struggling, I finally made the cut—albeit at the wrong angle. Who knew an angle of 45 degrees was so critical? I thought I could wing it. I almost gave up right then, tossing aside the wood like an ugly Christmas sweater. But as I leaned back in my chair, sipping some lukewarm coffee (a rookie mistake to let it sit), I realized failure was part of the process.
Adjusting Expectations
So, I took a deep breath. “Alright,” I told myself, “let’s adjust.” I pulled out some scrap wood and decided to practice—good ol’ trial and error. I spent hours making cuts, adjusting angles, then sanding off those jagged edges. I laughed when I finally managed to make some good joints, feeling like I’d discovered fire or something.
I remember the way the pine smelled as I sanded it down, that fresh, woody scent enveloping me, almost drowning out the faint smell of burning sawdust. It was strangely calming. As I truly started getting into the rhythm of it, I felt like each cut told a story—and if nothing else, it gave me a chance to reflect on my own holiday memories.
The Assembly Line Blues
Once I had the pieces together, I got to the fun part: the assembly. Man, this is where I thought, "I’ve made it!" It turned out I hadn’t made it quite yet. You think slapping wood together is easy, but I nearly lost my mind trying to figure out how to attach the tiers securely. Wooden dowels, glue, all that jazz—you’d think it was like trying to solve a Rubik’s Cube blindfolded.
I used some Elmer’s wood glue and clamps I had from earlier projects. Oh, let me tell you, the sound of those clamps biting into the wood was like music—comforting and a bit nerve-wracking, all at once. I kept checking every five seconds, watching the glue dry, whispering, “Please hold.” I may have even offered a little silent prayer for those dowels!
Pushing Through
Eventually, I stepped back and realized it was sort of… well, sort of something. Not perfect, but charming in its own way. At least that’s what I kept telling myself. Satisfied, I painted the figures representing Mary, Joseph, and baby Jesus—it felt a bit like channeling my inner child, colors splattering here and there, fingers getting sticky. Yes, my hands looked like a paint factory had exploded, and I likely inhaled more paint fumes than I should’ve, but it was fun.
I even lit candles for the first test spin, my heart racing, convinced the whole thing would go up in flames. But when I finally saw it spin, I almost cried. It was that raw, imperfect beauty that held the essence of the holiday spirit.
Reflecting on the Journey
So here I am, sipping coffee again, looking back on an adventure that pushed me to just let go of perfection and embrace the mess. It’s a lesson I wish someone had handed over to me earlier, you know? If you’re thinking about trying something—anything really—don’t let fear of failure hold you back. Every misstep, every ugly cut teaches you something valuable.
At the end of the day, it’s not just about making a Christmas pyramid. It’s about the love you put into it, the memories you create, and the fact that you were brave enough to try. If I could sum it up in one warm, cozy thought: Don’t be afraid to make mistakes; they might just lead you to exactly what you need. Just dive in and have fun with it!


-120x120.jpeg)


