Down the Rabbit Hole of Building an L-Shaped Desk
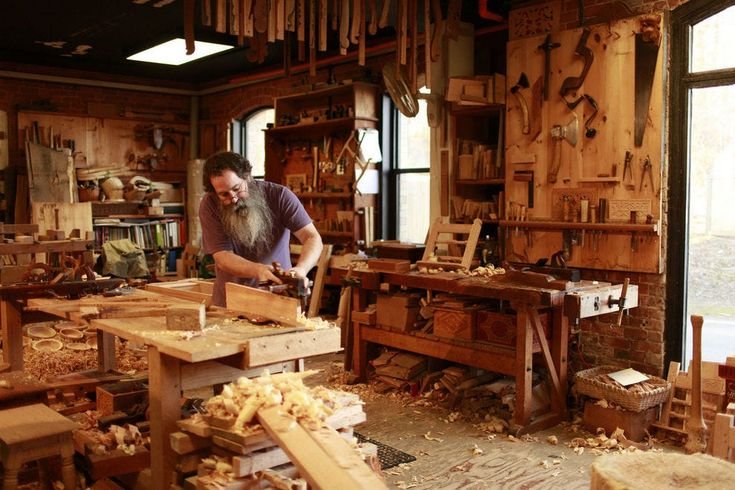
Ah, the smell of sawdust. You know, there’s nothing quite like it. I was leaning over my workbench with a steaming cup of coffee one Saturday morning, the sun barely peeking through the windows, when it hit me. I desperately needed a new desk. The kind of desk that just doesn’t scream “I’m working from home!” A desk that fits in that little nook of my studio apartment. So, after one too many late-night scrolling sessions on Pinterest, I landed on this beautiful L-shaped desk design. Well, let me just say, I thought it would be a simple weekend project. Hah!
The Grand Vision
So, I had this grand vision in my mind. I wanted it to be sturdy, stylish, and all around a showstopper. I can picture it now—some beautiful walnut wood, rich and warm, catching the afternoon light. What can I say? I’ve watched one too many DIY shows. They made it seem so easy, didn’t they?
I headed down to the local lumber yard—Blake’s Wood Emporium, a place just around the corner. It’s got that delightful mix of wood scents; you’re hit with cedar and pine as soon as you walk in. It’s like a warm, inviting hug for anyone who’s a little bit wood-obsessed.
I finally settled on some nice birch plywood for the main surface—light and smooth. Honestly, my budget couldn’t handle walnut. Who was I kidding? I came home, nervous and excited, clutching my materials like a trophy.
The Assembly Chaos
Now, here’s where things start to get a little… let’s say interesting. I had all my tools lined up like soldiers—my trusty miter saw, a power drill that I’m pretty sure has seen better days, clamps, and a measuring tape that I found in the bottom of my tool bag. You know the kind that sticks, half-dented from years of being jammed in there with everything else, but still manages to do the job.
Cutting the plywood wasn’t where I faltered; oh no. I got through that with relative ease, channeling my past carpentry classes from high school—at least the parts I paid attention to. It was the assembly phase where I really hit a snag. You’d think it’d be a straightforward “measure twice, cut once” kind of scenario, right? But then I started slapping those pieces together and, wouldn’t you know it, nothing fit quite right.
I should mention that I was using pocket holes for joining the pieces together—something I thought would be foolproof. And, well, at a certain point, that plan unraveled. Let’s just say pocket holes aren’t so forgiving when your measurements are off by just a smidge. I honestly almost gave up after realizing one side was two inches longer than the other. I sat there staring at my half-finished desk, my coffee going cold in my hand. "What was I thinking?" I thought. I almost chucked everything into the garage and called it a day.
The Sweet Victory
As fate would have it, I found a bit of grit. I grabbed some sandpaper and started working—letting the sound of my sander drown out my frustration. The smoothness of that birch after a solid sanding session was oddly satisfying. It was like I could feel my determination shaping the desk, bit by bit. I chuckled to myself when I finally slapped on my first coat of stain. It actually worked! The color was beautiful, richer than I expected; the kind of color that would make your heart skip a beat.
Fast forward a few more hours of trial and error, and I finally had the frame put together. I was holding my breath as I flipped it over to see it standing. I honestly half-expected it to collapse on me, but it held! There it was—my L-shaped desk, standing proud in the corner of my room like it was meant to live there all along. I probably looked a sight, covered in sawdust and bits of wood splinters, but in that moment, I felt like a king.
The Little Touches
The real charm of it came when I started adding my little touches. I found some vintage drawer pulls at a thrift store. They totally added that rustic flair I was looking for. I contemplated a nice coat of polyurethane to seal it all in. It’s amazing how quickly you start caring about the little details once you’ve invested your sweat into something. I remember thinking, “Wow, this is really mine!”
Closing Thoughts
So, if you’re out there and you’re mulling over the idea of taking on a project like this, let me tell you something: Just go for it. You’ll mess up, maybe a few times, and you might have a moment or two where you think, “This is so over my head!” But trust me, there’s nothing like the satisfaction of creating something with your own hands—even if it might end up with a few battle scars.
And all that worry and doubt? They’ll be eclipsed by the joy when your creation finally comes together, just as you imagined it. I can’t wait to sit at my desk, sip my coffee, and, who knows, maybe even jot down a few thoughts for the next project. Here’s to the next adventure—wood shavings, coffee stains, and all!


