Just Another Day in the Workshop: The Dinosaur Bank Saga
So, there I was, sitting in my little workshop on a rainy Saturday—thunder rumbling like it was auditioning for a bad action movie, and I had my old coffee mug cradled in my hands. This wasn’t just any coffee. Nah, this was that strong brew my buddy Tom swears by, the one that can wake the dead. Anyway, it was the perfect setting for what I thought was going to be a whimsical little woodworking project: a dinosaur bank for my niece, Lucy. Now, Lucy is five, and like most little kids, she’s obsessed with dinosaurs. I thought I’d be the superhero uncle who crafts the coolest bank in town. But oh man, let me tell you about that wild ride.
The PSYCH of the Plan
I found the plans online—easy peasy dino bank, they said. What they didn’t mention was the frustration I’d face. You know how sometimes ideas seem great until you start? Yeah, that was me. I printed out the plans, which looked like they were drawn by a four-year-old, with animal crackers as rewards. It was supposed to be straightforward, just plywood pieces shaped into a brontosaurus, and the mouth would be the slot for her coins. Simple, right?
I like working with pine—it’s soft and, honestly, smells kinda sweet when you cut into it. It reminds me of my granddad’s workbench, where I spent many summers as a kid. But this time, I thought, why not go fancy? I picked up some birch plywood, thinking it would give that bank a bit of a classy look. Spoiler alert: birch is a pain sometimes.
The Cutting Calamity
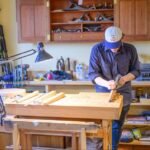
Armed with my trusty circular saw and an unhealthy dose of confidence, I got to work. Things were going well at first. The smell of fresh wood filled the garage, mixed with the faint whiff of coffee still lingering in the air. The saw’s roaring kind of calmed my nerves, almost like a lullaby for grown-ups—I guess that’s what a power tool does for a woodworking nerd like me.
But then I got cocky. As I was cutting the head, I accidentally jostled the panel, and let me tell you, that saw has a mind of its own. Instead of a clean cut, I ended up with a jagged mess that looked like it belonged in a horror movie rather than a children’s bank.
I mulled it over, staring at my ragged piece of wood like it was the world’s worst piece of art. I almost gave up at that point. Maybe I should just buy one online, I thought, but that didn’t sit right with me. So, I took a deep breath, cursed a bit—real therapeutic, you know—and decided to sand it down.
Learning Through Errors
One of the most charming things about woodworking is that you learn through every mistake. With a lot of patience, I managed to make it look somewhat decent. I filled in gaps with wood filler, which smelled like peanut butter, and sanded those rough edges smooth. I found myself chuckling as I went, thinking, “Well, if this doesn’t work out, at least Lucy will have a good laugh.”
Now, painting was its own adventure. I thought a bright green would be befitting of a dino bank — you know, like the cartoonish ones. Turns out, more than just paint was required. That stuff splattered everywhere. My sneakers now had green spots, and the garage walls looked like a dino vomited its breakfast. I should have worn an apron or something, but then again, where’s the fun in that?
The Moment of Truth
Finally, after what felt like two weeks (but was probably more like a long weekend), I was ready to assemble it. I pulled out my trusty wood glue, which has been a faithful sidekick on many projects. Remember to clamp everything down, right? Nope. I skipped that step. Classic rookie move. I glued everything together, held my breath, and prayed. I was waiting for that satisfying “thunk” sound when the pieces snugly fit together.
But then came the moment of silence. After an hour, I peeked under the towel where it was drying. I laughed when I actually saw it all hold together—despite my flubs, it looked like an actual dinosaur!
The Big Reveal
When I finally presented it to Lucy, her eyes just lit up! “Dinosaur!” she squealed, and I was like, "Okay, I achieved my goal!" In that moment, all the effort, the agonizing missteps, even my dino-vomit garage, vanished into thin air. I even filled it with a few dollars, those shiny coins reflecting all my hard work.
The best part? Lucy immediately started feeding it her tiny pennies. The dinosaur bank didn’t just work; it became a living thing, full of her dreams and plans for what that little dino would accomplish—maybe even saving up for her very first real dinosaur toy.
Final Thoughts
So, if you’re sitting there, thinking about your next woodworking project, don’t sweat the small stuff. Everyone has their fails—they’re just part of the journey. If I can figure out how to turn some wood into a dinosaur bank that brings a smile to a kid’s face, then I promise you can do whatever you’re dreaming of too.
Just grab that piece of wood and go for it. Because, in the end, those rough edges? They just make the finished product all the more special.