Coffee, Wood, and a Whole Lot of Patience
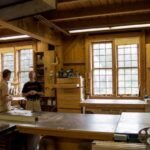
You know, there’s something magical about having a cup of coffee in one hand and rough-cut lumber in the other. The scent of fresh wood—especially pine—fills the shop, mingling with that strong brew I took a little too long to make. It brings a bit of warmth to the frigid winters here in our small town. Those chilly mornings often lead to some memorable adventures in the garage.
Last winter, I decided to tackle a project that’d been rolling around in my head for a while—a blanket chest. I mean, who doesn’t need one more place to throw all the random stuff cluttering up the living room, right? I thought, "How hard could it be?" Spoiler: it was harder than I thought, but ain’t that a tale for the ages?
Diving into it
Now, I’m no master woodworker. I’ve seen enough YouTube videos to think I could pull it off—wood glue here, clamp there—but those videos never show the mess-ups. Trust me, I have a bunch of those under my belt. Back then, I thought I knew what I was doing, in that cocky way that only comes when you’ve nailed a project or two.
So I hit up the hardware store down the road. You know the one, run by Mr. Jenkins? Such a good guy, always has donuts in the back and is happy to share the latest gossip. He gave me the strangest look when I asked for plywood and hardwood. I guess it’s not every day a guy walks in asking for “fancy” wood. I ended up with birch plywood, which really felt like a step up for me. The texture of birch, smooth as butter, kind of made my eyes light up. But honestly, I should have thought it through a little more.
The first cut
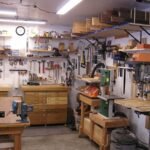
I got home, and after a few deep breaths (and maybe another big sip of coffee), I fired up my old circular saw. Let me tell you, that thing has seen better days. It was squealing and whirring like an angry squirrel when I put it to work. In hindsight, I probably should have checked the blade; it could’ve used a good sharpening—or even a replacement. But as I cut those pieces for the chest, I felt like a pro.
Ah, but the universe has a funny way of reminding you that you’re not quite there yet. I finished cutting the sides and the top, but when I laid everything out, it looked like… well, let’s just say it didn’t look like the sleek masterpiece I’d envisioned. I had a moment where I almost tossed everything out into the snow. Seriously. The angles didn’t match up, and I could hear my wife’s gentle voice in my head asking why in the world I thought I could make something that looked decent.
Getting it together
After a moment of doubt, I took a breath, shut my garage door, and sat down with my coffee. I realized I needed a little help. A chat with the woodworking group over on social media inspired me. You wouldn’t believe how supportive folks can be. They shared tips, and one guy even mentioned using pocket holes for joints. I felt like a light bulb went off. So I invested in a Kreg Jig, which felt like some sort of wizardry. Screwing those joints together felt less intimidating, and like they were just snapping into place.
The hum of my drill was oddly soothing, and I started feeling like I was in control again. The dust settled into the corners of my little shop, and the smell of fresh pine pulled me back in. I even got a little carried away and added a bit of a decorative lift to the lid. I thought—why not make it a little fancy? The sound of the wood glue squishing out as I clamped was oddly cathartic.
The finish line? Sort of.
Once I got the frame solid, I started thinking about the finish. At first, I was going to go all-in with some dark stain. It seemed so chic in my head, but when I mixed it up and slapped it on, I cringed. It looked like I’d spilled my coffee all over it! After a few choice words, I sanded it down, got rid of the darkness, and instead went for a clear finish. A little coat of poly, and suddenly, something magical happened. The wood popped with that grain—a warm golden hue that just felt like home.
At that point, I was chuckling to myself. It actually looked pretty good! In my wildest dreams, I hadn’t expected to be proud of this blanket chest—this straightforward, humble piece that I almost abandoned. Those little wins resonate; they remind me what it feels like to create something with my own two hands, even through the bumps along the way.
Sittin’ pretty
Now we’ve got that blanket chest propped up in the living room, holding everything from cozy throws to the random assortment of board games the kids toss around. And every time I catch sight of it, I can’t help but smile—sometimes it really works out, even when you think you’re swimming upstream.
So, if you ever think about diving into a project like this—whether it’s a blanket chest or something else—just go for it. Seriously. The journey is just as valuable as completing the project. Don’t sweat the small stuff and don’t be afraid to ask for help. Life’s too short for perfect woodwork, but it’s long enough for a good cup of coffee and a bit of patience. Enjoy the journey, my friend!