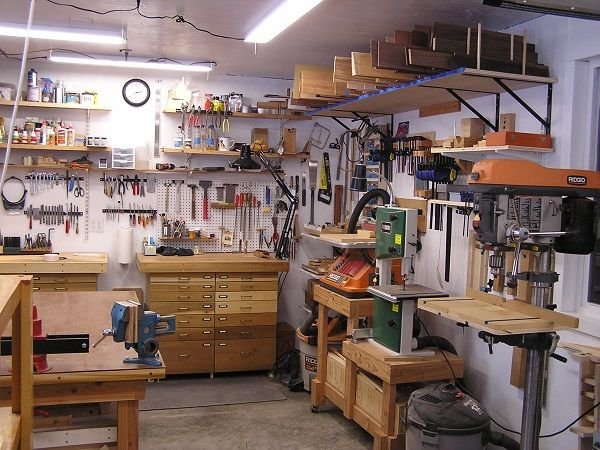
A Woodshop Misadventure: On Shelving Strength
You know how it goes. It’s a Saturday morning, you’ve got that hot cup of coffee steaming in your hands, and you start flipping through some old woodworking magazines. This is my guilty pleasure — I can get lost in those glossy pages for hours. I remember one particular story that popped out as if it were calling my name: "Building the Perfect Shelves for Your Garage." I thought to myself, “How hard could it be?”
Well, spoiler alert: it was a lot harder than I imagined, and the lessons I learned along the way are ones I think about every time I step into my garage. Grab a cup, will ya? Let me tell you about the time I turned my woodshop into a bit of a circus.
It all started with a mission. My garage was a hot mess, everything crammed into corners and stacked haphazardly. I was tired of playing Tetris every time I needed to grab something. So, I decided to build some sturdy shelves to keep my tools, camping gear, and… okay, yes, Christmas decorations (don’t judge me) organized and off the floor. And I wanted them to be strong enough that I wouldn’t fear the whole thing collapsing under the weight of my, um, "collection" of boxes.
The Wood and the Woes
I headed over to the local lumberyard — you know, the kind of place where they know you by name because you’ve spent so many Saturday mornings wandering around. I picked up some good ol’ plywood and pine. It smelled fresh and earthly, a kind of clean scent that always gets me excited. There’s something about being surrounded by wood that just feels right, don’t you think?
Back home, I re-stacked everything to make room, and I laid out the wood on my workbench. I had my trusty circular saw — a Makita, if memory serves — ready to make clean cuts, and I was feeling pretty proud of myself. But then came the first misstep. I had this grand idea of building the tallest shelf in the history of mankind. I was going to kiss clutter goodbye!
So there I was, making my cuts, measuring twice (okay, sometimes just once), and putting this thing together. I felt like a damn carpenter, let me tell you. But when I stood back to admire my work, I thought, “Oops, maybe this is a little too tall.” The shelf was almost touching the ceiling — and reality bit me hard when I realized how wobbly it looked.
I tried to reassure myself — “It’s fine. Just add some brackets!” So, I grabbed these little L-brackets from my stash. They were cheap ones, maybe from Harbor Freight or something like that. I figured they’d do the trick. I drilled them into the sides and felt a glimmer of hope.
The Moment of Truth
Now, here comes the part where I almost lost my cool. I heaved the first box up, filled with tools and a few heavy books I didn’t think I’d ever read again. You know, the kind of stuff you keep even though you swear you’re going to read it one day. As I set it down, I could feel the whole shelf shudder. My heart raced. It was like one of those old game shows where they asked you to balance something on the edge of a platform — you’re just waiting for the inevitable disaster.
Did I mention the sound? The ominous creaking? I thought I’d built a shelf, but it sounded like a haunted house. Just when I was ready to give up and shove the entire thing out of my garage, the wonders of woodworking struck: it held. I laughed out loud, half relieved and half incredulous. Who knew I had it in me?
But, of course, the shelf wasn’t the real problem. It turned out that constant creaking wasn’t a good sign. After a few weeks, I realized it was bowing under the weight — a testament to my amateur skills. I found myself shaking my head, staring at this monument to hubris. I’d been so eager to jump in without thinking it through. My first mistake? Thought I could wing it.
The Fixer-Upper Journey
It took a good chunk of a weekend to disassemble the whole thing and start fresh. This time, I learned to trust those brackets more – but also went for heavier-duty ones. I splurged a bit and grabbed some better-quality pine, the kind that smelled like a walk in the woods. You know that rich, satisfying scent? It reminded me of childhood days spent in my grandfather’s workshop, the air thick with sawdust and stories.
Now, here’s the kicker. As I rebuilt, I unfolded some good ol’ math I learned back in school — how to calculate weight distribution and all that jazz. My dad would’ve been proud of me, even if he’d have been rolling his eyes at my earlier attempts.
With a bit more planning, new constraints, and some elbow grease, I finally stood back and admired my handiwork. This time, the shelves felt solid. It’s funny how much I appreciated the little things. I caught myself just standing there, wood shavings underfoot, smelling that fresh-cut pine and nodding in silent satisfaction.
The Warm Takeaway
So, where does that leave us? I look at those shelves every day, a symbol of lessons learned. Sure, I had to learn the hard way that strength isn’t just about heft — it’s about balance, materials, and a whole lot of patience. I sometimes chuckle at the memory, a moment where I almost threw in the towel, but those shelves now hold everything from wrenches to seasonal decorations without so much as a creak.
If you ever feel like diving into a woodworking project, I guess what I’m saying is, just jump in. Don’t let the fears of failure hold you back. We all learn from our messes, and trust me, you’ll appreciate the time spent tinkering in your workshop a whole lot more after you’ve wrestled a few shadows from your past mistakes. So go ahead, grab your coffee, and build something that makes your heart smile. You’ll find a way, even if the process is messy and imperfect.

