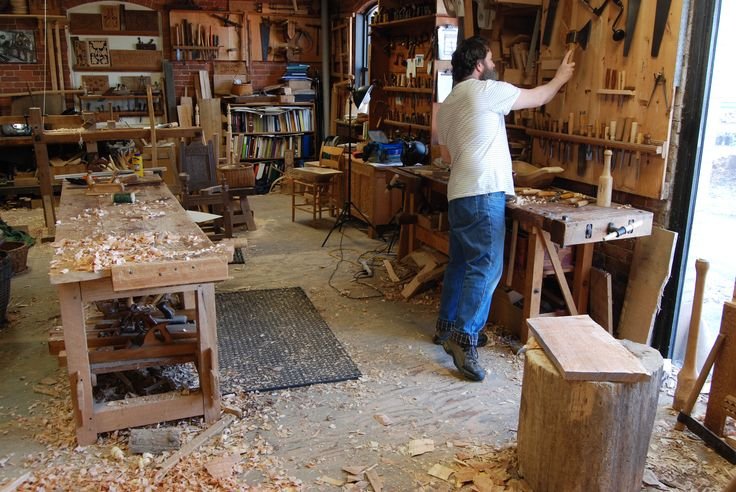
Just Another Day in the Shop
So, let me tell you about this little woodworking journey of mine. It wasn’t that long ago, a few months back, when I decided I was finally going to tackle this project that had been rattling around in my brain—a rustic coffee table, something that would fit right in against the backdrop of my small-town living room. I mean, who doesn’t like a good cup of coffee laid out on a sturdy table, right?
The Vision
I’d seen a picture of this beautiful live-edge coffee table on Pinterest—gorgeous slab of walnut, just oozing character. And I thought to myself, “How hard could it be?” Spoiler alert: I was in for a rude awakening. First off, I had no clue how to pick wood, or what “live edge” really meant. I had this romantic notion that I could just waltz into the lumberyard, pick up whatever caught my eye, and bam! Coffee table time.
So, there I go, all excited, strutting into the local lumberyard on a Saturday morning. The smell of freshly cut wood hit me like a warm hug, you know? I’m surrounded by these massive stacks of timber, and for a moment, I felt like a kid in a candy store. But the excitement quickly morphed into confusion. I remember standing there, staring at a whole pile of walnut, oak, and maple.
“Uh, excuse me,” I finally asked one of the guys, trying to sound casual. “What’s the difference between all of these?” Let’s just say the guy wasn’t too impressed with my ignorance. But he did steer me toward a nice piece of walnut, which I felt pretty fancy about.
The Tools
Once I got the wood loaded up in my truck—seriously, this piece of walnut was a beast—I got home and set up my makeshift shop in the garage. Think of it: Dad’s old workbench piled high with tools, sawdust underfoot, and that clean smell of wood still lingering. I’d gathered my tools: a circular saw, a sander, clamps, and my dad’s trusty random orbit sander, which, let me tell you, sounds like a tiny jet engine when you crank it up.
I had this vision in my head of the final product, sleek edges and all. But, man, when I started cutting into that walnut, the reality hit. Did you know that when you cut walnut, it just smells downright amazing? Like, I don’t know, something comforting and homey. It was one of the few moments in the project where I thought, “Okay, this is gonna work.” But, of course, nothing ever goes as smoothly as you hope.
The “Oh No” Moment
So I’m cutting the slab, and I’m feeling pretty proud of myself when — BAM! The saw binds, and I feel that heart-dropping moment that every woodworker knows too well. I’d miscalculated the angle, and there’s this awful split in the wood now. I stood there for a good five minutes, staring at it in disbelief. I almost gave up. I mean, who did I think I was? I didn’t want to be “that guy” who couldn’t even cut a straight line.
But, you know, sometimes you just have to swallow your pride, take a deep breath, and salvage what you can. I finally decided to reshape the cut into something more like a natural edge. Kind of an artistic take, right? Honestly, at that moment, I felt like I was channeling my inner lumberjack—or maybe just trying to convince myself I wasn’t completely incompetent.
The Highs and Lows of Sanding
When I finally got the pieces together, the next part was sanding, which sounds easy enough until you actually try it. I set up my sander and, oh my goodness, the dust. It was everywhere! I had a nice little cloud floating around me, and I started wheezing like I was about to enter a competition for worst asthma attack. I didn’t realize how unprepared I was. A dust mask? Yeah, didn’t think of that until I was halfway through.
But the real joy was when I finally got it all sanded down to a smooth finish. I was grinning like a Cheshire cat. The walnut grain started to pop, and I genuinely felt like I’d created something beautiful instead of just fighting with a stubborn piece of wood. There’s something about the tactile experience of it—the smoothness beneath your fingers, the weight of it—it’s pretty satisfying.
The Final Touches
Next step was the finish. I decided on a simple oil rub, a Danish oil that my neighbor, Mr. Wilson, had recommended. He’s a bit of a woodworking wizard himself. You should have seen the way his eyes lit up when he saw my progress. There I was, wiping the oil on the table, and the rich color just came alive! I actually laughed when it worked out. I was so engrossed in how it transformed that piece of wood that I completely forgot about the mess I’d made earlier.
After letting it cure for what felt like an eternity, I finally got it into the living room. I threw on a few coffee table books, a couple of candles, and voilà! My pride and joy was complete. But, you know, it wasn’t perfect. There were dings, a couple of splintered spots, and I can even see where the grain kind of spiraled. But it was mine. I created it, and that feeling—that feeling was what made it special.
A Warm Takeaway
If there’s one thing I learned from this whole experience, it’s that mistakes are part of the journey. I wish someone had told me that sooner. If you’re thinking about diving into woodworking—or any project, really—just go for it. Don’t let the fear of messing up keep you from trying. Embrace the chaos, learn from it, and maybe, just maybe, you’ll end up with something beautiful that you made with your own two hands. Let me tell you, that, my friend, is worth far more than a perfectly straight edge.

